Featured post

Tech Tools that Prevent Information Overload

Organizing Information Cover

If you’re an “information junkie”, you have likely struggled with how to manage the constant flow of information that comes across your radar every day. Before I ironed out my systems for gathering and retrieving information, I often felt like my head was about to explode as I attempted to capture information with primitive tools like paper notebooks, and browser bookmarks.

Today, I’ll introduce you to some sanity-saving technology tools that I discovered that have increased my productivity exponentially.

Feedly

I’m a heavy consumer of blog content, and used to struggle with keeping up with all of my favorite blogs. Oftentimes, I’d stumble across a great blog, bookmark it, and then forget all about it. Jumping from website to website in an effort to keep up with my favorite bloggers would often result in lots of time wasted with all of the opportunities for distractibility. To remedy this, I started signing up to receive blog posts via email, but over time, these posts start to clutter up my Inbox.

That’s when I discovered Feedly.

Feedly

Feedly is an RSS aggregator…a single place where you can read all of your blog posts, as well as online newspapers and magazines in a customized “feed” that you design. Consuming information in this streamlined, distraction-free format saves me tons of time, and ensures that I never miss a post from any of my favorite blogs.

The Feedly app enables you to access your media feed when you’re on the go via your mobile devices. So convenient when you have 15 minutes to kill while waiting in the school pick up line!

Pocket

How often do you find yourself stumbling upon a great article while surfing the web, but you just don’t have time to read it that moment? How can you tuck it away to read later?

1. Print it out (and create paper clutter)

2. Email it to yourself (and create inbox clutter)

3. Save it to your bookmarks (and never see it again)

4. Use a super cool tech solution that consolidates all of this type of information into one convenient place for you to view later when it’s more convenient

Pocket

I choose #4 and use Pocket as my solution for this common information organizing need.

For my business, I use Pocket for gathering cool content that I eventually plan to share across my business social media platforms. Essentially, I create a “menu” of great articles, tips I’ve come across on other’s social media sites, images, videos, etc. that I can pull from to create Facebook posts and tweets that will be of interest to my audience each week. For a great summary of all the ways you can utilize Pocket, read here.

Like the other tools, Pocket has an app for both iOS and Android devices that enables you to save content from any mobile device. Like Evernote, Pocket offers a bookmarklet that you can install in your browser that allows you to save any piece of web content to Pocket with a single click. In addition, it’s integrated with over 1,500 apps like Twitter and Feedly.

Pocket is a really useful tool for people who are prone to distractibility and often find themselves “going down a rabbit hole” while surfing the internet. Instead of getting sucked into reading interesting articles that are irrelevant to the task you are currently attempting to complete online, get in the habit of simply clicking the “Save to Pocket” bookmarklet. You can easily view these articles later on at a time that you’ve officially earmarked for leisure reading.

Evernote

Evernote‘s tagline is “Remember Everything.” Enough said.

Evernote

It’s difficult for me to imagine my “Pre-Evernote” life. I like to describe Evernote as my “virtual bulletin board” and/or my “resource library”. It’s the place where my recipe collection lives. It’s the place that I corral all of my travel information for upcoming trips. It’s the home for all of those random hobby-related articles I’ve torn out of magazines and since scanned into a digital file. It’s the repository for all of my business-related project materials.

My absolute favorite Evernote feature is the Web Clipper, which I use to curate and save web content for future reference. In my Pre-Evernote life, I used my browser bookmark function for this purpose. Despite having a well-organized bookmark folder structure, I found myself losing so much time hunting for a particular website. Evernote’s remarkable tag and search capabilities make information retrieval effortless and lightning fast.

In addition to web content, Evernote can be used to capture and store information in a variety of other forms including: photos, videos, text, documents (PDF, Word), even voice messages… all in one place. The Evernote app enables you to have access to all of your content from all your devices. Hands down, the magic of Evernote is that it utilizes OCR (optical character recognition) technology to make the content of your notes searchable…even a photo you took of a handwritten post-it note!

Have additional tools that you use to organize information? I’d love to hear about them. Please share in the comments section.

  Want to learn more about Natalie Gallagher or Refined Rooms?  Visit www.RefinedRoomsLLC.com or connect via: Facebook Pinterest | Twitter | LinkedIn

Featured post

The #1 Tool for Breathing New Life into Your Old Home Decor

spray paint cans (3)

Why get rid of something, simply because the color isn’t right? Spray paint is the magical solution for this problem! It’s easy. It’s cheap. It’s fast. It has come in especially handy over the past few months, as I’ve undertaken a fairly extensive redesign project, which consists of a complete overhaul of my home’s color palette.

Spray paint station

Everything that’s gold, red and brown needs to go. But neither my budget nor my husband will let me toss out all of my existing home decor and replace it with items that fit the new design scheme. What’s a girl to do? This girl drove to the nearest home improvement store and picked up a couple of these:

Spray Paint Cans

I’m not really faithful to any particular brand of paint, I’ve had consistently positive experiences with the brands you see in the above photo. When selecting your spray paint, the number one piece of advice I have is to read the instructions to ensure that the spray paint you’ve selected is meant to cover the type of surface that you’re working with.

Let me take you on a brief tour of some of the pretty transformations in my home that have been made possible by spray paint, beginning in the foyer with this entry corner. In a former life, the monogram G was silver, and as you can see, the floor vase was red. I was a little hesitant to see how the lacquer surface of the vase would take to spray paint, but I it turned out beautifully.

Spray paint foyer vase Collage

Next, we move into the living room. I love the lines of this table lamp, but the brown color was just not going to cut it in the redesign. It wasn’t easy finding spray paint in a navy blue gloss sheen, but on Amazon.com, you can find just about any shade of spray paint.

Spray Painted Lamp Collage

Spring green is another new accent color in my redesign. You can imagine my delight when I found spray paint in this color at my local Lowes. I went to town spray painting various pieces of decor in my great room with this fun color, including these over-sized mantle finials (which were formally brown):

Spraypainted Mantle


I used that same can of navy blue paint to transform this brown vase located at the top of the media cabinet in my great room:

Spraypainted Vase Collage


I could not part with this uniquely shaped wall sconce, just because of it’s now the wrong color. Paint it blue and add the cute coral candle holder for $3 and it’s like new!

Spraypainted Shelf Collage


This red lacquer tray works really works well in my home office, now that it sports a coat of satin nickel metallic spray paint, don’t you think?

Spraypainted Tray Collage

I’ll continue to share my experience as we complete various projects in our redesign Master Plan in future blog posts. In the meantime, check out my home redesign Pinterest boards as well! In the meantime, fire up those spray paint cans and see how you can achieve some home decor transformations of your own.

 Want to learn more about Natalie Gallagher or Refined Rooms?  Visit www.RefinedRoomsLLC.com or connect via: Facebook Pinterest | Twitter | LinkedIn

Featured post

Can’t Seem to Move Forward With Your Organizing Project? Seek Out Help!

Do you always seem to have a list of organizing projects on your “To Do” list, but just can’t seem to get them done? Maybe you don’t know where to start. Maybe you’re feeling overwhelmed.  Maybe your projects keep getting put on the back burner because you have too many other demands on your schedule. It may be that you need to conduct a little product research before you can move forward.

Maybe it’s time to get help! 

HELP for Organizing Projects compressed

If you’re feeling stuck, I invite you to consider these options for getting the assistance that you need in order to organize that home office, declutter that closet, or sort those boxes in the garage.

1. Books

Conduct a basic Google search, and you’ll be surprised at the array of available organizing books. There are books designed to walk you through the basic process of organizing, as well as books that address specific aspects of organizing (e.g., various rooms, paper, time management, etc.) Still others provide an education on the psychology behind organizing (e.g., causes of clutter, habit formation, etc.).

I’ve created a list of what I consider to be the “Best of the Best” organizing books that I routinely recommend to clients . The list can be found on my website, in the Refined Rooms Amazon Store. Feel free to check it out to see if any of these books may be potentially useful to you.

2. Online Resources 

The internet provides endless opportunities for organizing guidance and ideas. Of course, we all know that Pinterest is the place to learn how to “organize on a dime” and to cleverly repurpose items for your organizing project. You can also find a printable checklist for just about any type of organizing project.

Online assistance goes beyond the pretty Pinterest pins. There are several online communities designed to provide ongoing organizing support to individuals who struggle to accomplish projects independently. Among these, my favorite is the Clutter Diet {affiliate link}.

Clutter Diet

This online program provides a weekly “menu” plan of organizing projects, tutorials, expert support, and community support to assist you on your journey to organizing project completion.

3. Friends & Family

Sometimes, all you need is a set of extra hands, or a person to talk to during a sorting session to make the aversive task more palatable. Tackling a project while partnering with another person can lead to getting more done in less time while having more fun in the process.

A friend or family member can also serve as your accountability partner…someone who can “light a fire under your butt” when you need it, or provide periodic check-ins to help you celebrate progress and navigate pitfalls.

4.  Professional Organizers

Maybe you’ve attempted to conquer disorganization on your own using a variety of self-help resources and have been unsuccessful. It could be that you just don’t have the time or motivation required to complete a large organizing project on your own. There are over 4,000 NAPO members who are ready to partner with you to help you achieve your organizing goals.

Check out the NAPO Professional Organizer Directory to find one in your geographical area if you desire to have a professional organizer work with you onsite. If you live in a remote area of the country and can’t find an organizer in your area, many professional organizers (including me!) provide virtual organizing services via phone/Skype/Facetime. The NAPO Virtual Chapter provides a directory of professionals who offer virtual organizing.

Take advantage of the available people and resources outlined above in order to finally cross that organizing project off of your “To Do List.” You’ll feel so glad you did!

 Want to learn more about Natalie Gallagher or Refined Rooms?  Visit www.RefinedRoomsLLC.com or connect via: Facebook Pinterest | Twitter | LinkedIn

Featured post

Photo Organizer Favorites: Forever Permanent Photo Storage Solution


ForeveCover

Since May is National Photo Month, I thought it might be useful to highlight a few of my favorite photo organization tools on the blog this month. First up is Forever.

As a certified photo organizer, it’s part of my job to recommend cloud storage solutions for my clients’ digital images. Forever is the place that I’ve chosen to archive my family photo collection, and it’s the solution I recommend most to my clients.

Why Forever?

So many reasons! Today I’ll focus on permanence and privacy.

Permanence

Forever makes a pretty amazing promise to it’s members – a guarantee that their photos will be safeguarded for the members’ lifetime plus 100 years.

They are able to make this guarantee because of their unique business model, which includes a conservatively managed trust that continues to pay for your storage, beyond your lifetime as well as the lifespan of the company. You own your storage space in the cloud, unlike other storage services that allow you to rent storage on a monthly/annual basis. You are able to pass down your digital archive to other family members after you pass away so that your memories continue to live on for the next generation.

Your photos are permanently stored at the resolution level at which they were uploaded. They can be downloaded in high resolution without having to pay a fee (which can’t be said for all photo storage sites).

In 2015, the prevailing image format is a .jpeg file. Given the speed at which technology changes, it’s highly likely that our images may take on a different file format in 50 years. If so, Forever has you covered. Forever will ensure that all of your digital content remains accessible over time by automatically migrating your files to current digital file formats.

Privacy

Unlike many of it’s competitors, Forever puts a premium on your privacy. You maintain legal ownership of your content and are in full control of who can view your images via their comprehensive privacy settings.

Forever account screen shot

In addition, Forever does not mine your data or sell it to advertisers. Read the terms and conditions of the current photo sharing site that you’re using to see if they can make that promise. Not likely (particularly if you are utilizing a free storage solution).

Organization & Editing Tools

Once you’ve uploaded your images onto the Forever platform, the real fun begins! You can easily apply tags to your images, which enables you to quickly corral your photos into albums based on theme, people, events, time frame, or any other category you want. This feature comes in quite handy for creating digital photo books.

Forever Organizing Tagging

Want to crop, resize, or adjust the contrast of a particular image? How about creating a black and white version? No problem. A wide array of basic editing tools is built into the Forever platform. You can choose to edit your original image, or keep the original untouched and create an edited image copy.

Forever Photo Editing

Mobile Access to Your Entire Photo Collection

As a photo organizer, I’m all about bringing my clients’ photos back into their everyday life. When I demonstrate how the Forever app enables you to access your entire photo library on any device to my photo organizing clients, they are ecstatic!

People typically use their camera roll to store digital photos taken with their mobile devices. These high resolution photos take up a ton of storage space, which limits the number of photos you can store on your device (raise your hand if you’ve ever had to delete photos in order to take new ones). With the Forever app, you can use the auto-backup feature to upload images taken via your mobile device to your Forever account. Once they are uploaded, you can delete photos from your camera roll and free up a ton of storage space on your device. Simply use the Forever app to view your photo library on the go!

Forever Mobile

Secure & Private Sharing

In addition to sharing your photos by letting others view them on your mobile device, Forever enables you to share individual photos or albums using their secure and private social features. You are able to share photos via email or social networks using a link that you control. Sharing recipients do not have to have a Forever account in order to view your photos.

You share what you want with whom you want.

Privacy


Forever is featured in the Products I Love menu of the Refined Rooms website. You can click through and sign up for a free membership in order to test drive this great product to see how it can make managing your photo collection a breeze!

  Want to learn more about Natalie Gallagher or Refined Rooms?  Visit www.RefinedRoomsLLC.com or connect via: Facebook Pinterest | Twitter | LinkedIn


DISCLOSURE: This post was sponsored by Forever. The opinions expressed are solely my own, based on both my personal experience as well as the experience I have working with photo organizing clients. 


Featured post

My Favorite Tools for Organizing Your Home Remodel

Organizing Your Home Remodeling ProjectAs I mentioned in a previous post, our household is in the midst an extensive remodeling/redesign effort that includes a series of sub-projects throughout the first floor and exterior of our home. The list of sub -projects includes:

  • Adding trees, plants and hardscapes to the side and back of our property
  • Repainting the 1st and 2nd floor
  • Dining room redesign
  • Great room redesign
  • Powder room remodel
  • Kitchen remodel
  • Installing tile floor in laundry room
  • Installing hardwood flooring throughout the first floor

We officially kicked off the master project last November, and anticipate completing our projects in late 2016. One benefit of tackling this beast of a project is that it provides a ton of fodder for upcoming blog posts!

In future posts, I’ll share all the fun I had with wallpaper removal, how I harness the power of spray paint for redesign, my method for selling home decor that no longer fits in the new design scheme, and how I’ve battled design decision burnout. But first, let’s talk organization.

As you can imagine, there are lots of moving pieces/parts to keep track of when undertaking such a major home improvement project. For that very reason, it is crucial to have solid organizational systems in place for managing it.

Today, I’ll share my arsenal of “Must Have” organizational tools that have allowed me to maintain my sanity thus far during the remodeling process.

Tool #1:  A Binder

So simple, yet so effective at keeping all the paper related to our project in one central location. Of course, I picked a binder that matched the new color scheme of our redesign!

Home Remodel Binder 5
I used Smead 3-hole punched Poly Translucent Slash File Folders and an old set of tab dividers with an index sheet to organize project-related information into key categories, including: Timeline, Budget, Contractor Business Cards, Paint Samples, Furniture/Fixture Sourcing, Project Bids, Plans/Sketches, and Notes.

Home Renovation Binder1
I created the binder prior to beginning our project. As things progressed, I discovered a new tool for managing the project timeline/budget (see below), so those binder sections are no longer used.

Even though I’m a “paper-less” girl at heart, my Hubby is a paper lover. Since we both need access to the remodel information, it just made sense to keep the majority of project information in paper form.  Besides, it makes a lot more sense to view paint colors via paper swatches rather than on the computer!

Home Remodel Binder 3

It’s also much easier to modify a design sketch via the old school paper and pencil method anyways:

Home Remodel Binder 4

Tool #2:  Pinterest

It probably comes as no surprise that Pinterest made the list. I have been using this awesome tool since its inception to curate ideas/information for both myself and my clients.

I’ve created a series of Pinterest boards that serve as a collection hub for my product sourcing options, color palette, and images of “inspiration” spaces.

Having all of the information gathered together in a single board helps me to easily communicate my vision for each sub-project with Dear Hubby, as well as with contractors.

Remodel Pinterest Boards

{Feel free to follow me on Pinterest so that you can checkout all of my helpful organizing boards, and follow along as I complete our home remodel!}

Here’s a sneak peek of my Powder Room Redesign board. It’s so helpful to be able to click on a particular product and link directly to the source to obtain information on pricing, dimensions, customer reviews, etc. Gathering all of of your product options in one place enables you to make side-by-side comparisons, so you can make design decisions faster and easier

(I still need to decide on a light fixture. Vote for your favorite in the comments section!)

Pinterest Powder Room Inspiration Board

Tool #3:  HomeZada

HomeZada is a digital home information tool that helps homeowners organize and maintain all facets of their home. The free version of HomeZada enables you to create a home inventory. Upgrading to a premium subscription gives you access to a universe of additional home management tools, including the Home Improvement project management feature.

Within this module, the Project Inspiration option includes a set of room-specific boards chalked full of great ideas to consider as you design your new space:

Homezada Project Inspiration

You can create a project in a snap by selecting from a menu of common home improvement projects, or by creating your own custom project:

Homezada Create New Project

Here’s a snapshot of my master projects dashboard, which lists the status of each sub-project:

Homezada All Projects

You can specify a budget and timeline for each project. The Project Planning page provides a big picture monthly budget planning tool that lets you know at a glance the funds that are required each month to move forward as planned with your project timeline.

Homezada Project Planning

Within a particular project, you can calculate an estimated budget by creating a list of project items and a budgeted price for each item.

Homezada Project Items

The Shopping Choices option enables you to input a high and low price option for each item, so that you can determine what you can afford, given your budget constraints. Although I haven’t used this function yet, I can see how it can be valuable!

Homezada Shopping Choices

Once you’ve made purchases you can record the items within your project and HomeZada calculates the project cost to date, which you can then compare to your budget on the project dashboard.

Homezada Purchased Items

And every time you input a project purchase, HomeZada asks if you would like to add this item to your home inventory. Brilliant!

Homezada add item to inventory

HomeZada Giveaway!

Do you have a home remodeling or decorating project in your future? I want to help you be successful, so I’m offering a chance to win this great home improvement organizational tool!

homezada Giveaway

Reader Giveaway: Three (3) lucky blog readers will each win a 1-year subscription of HomeZada Premium ($59 value)!   Just complete the entry form on the Refined Rooms website (bottom of page) by 11:59pm ET on 5/8/15 for your chance to win. Good luck!

 Want to learn more about Natalie Gallagher or Refined Rooms?  Visit www.RefinedRoomsLLC.com or connect via: Facebook Pinterest | Twitter | LinkedIn

Featured post

Seasonal Closet Clean Out Tme

Spring Order Challenge Cover
Spring has {finally!} sprung, which means that many of us have set out on a spring cleaning/decluttering rampage throughout our home. Each spring, I begin with the most frequently used room in our home – the dual purpose laundry room/mud room. We are fortunate to have a large coat closet in this room, which we use not only for coat storage, but  also to store  shoes, winter accessories, and several miscellaneous items.

Since this closet sees a lot of action, it requires a high degree of weekly maintenance and a semi-annual seasonal clean-out to keep it functioning well for our family. In this post, I’ll be sharing how I prepped the closet for the spring/summer seasons, as well as a few minor tweaks I made to improve functionality in this space.

My first order of business was to launder every single winter accessory and store them away in this plastic drawer unit that lives at the bottom of the closet. I added labels to indicate which draw is designated for gloves, hats, and scarves.

Coat Closet Drawers

Second order of business…going through the coats to weed out the heavy winter coats, any coats that the kids have outgrown, or any that are no longer worn. Outgrown/unused coats will go to a local consignment store or donation center. Winter coats will be stored elsewhere for the next 6 months (more on that later in the post). While going through the coats, I also removed any wire/plastic hangers that somehow weaseled there way into the closet over the past few months and replaced them with wooden hangers. Although I am a huge fan of huggable hangers in clothing closets, I prefer wood hangers for the coat closet, since they are much less apt to break under the weight of a heavy coat.

I purchased a few water hyacinth bins from The Container Store to organize the insulated lunch bags/coolers that are stored on the upper shelf of the closet, as well as our vast collection of rain ponchos. I am a huge fan of these bins, as anyone who has taken a tour of my home can confirm. They are sturdy, inexpensive, and so pretty!

Water Hyacinth Bin 2

“An entire bin devoted to rain ponchos?” you ask. We use these all spring and summer for sporting events, camping trips, and amusement park outings. So yes, an entire bin for rain ponchos.

Water Hyacinth Bin 1

Voila! The hardest working closet in the house is now fully functioning for the spring/summer season. Bring. It. On.

Coat Closet Clean Up

There’s still the matter of where to store those pesky out-of-season coats. This is a yearly conundrum that I haven’t yet solved. I’ve tried to store them under the bed, but the low profile of the bed frame makes it nearly impossible to slide them under. But..wait! Perhaps there’s an organizing product out there that can solve this problem…

Ziploc Space Bags

Why yes there is. Have you heard of Ziploc Space Bags? These wondrous inventions enable you to triple or quadruple your storage capacity by vacuum-sealing your items into an airtight bag. They come in a variety of shapes and sizes. I used the XL Flat Bag to reduce my pile of winter coats from this:

Winter Coat Pile

down to this:

Ziploc Space Bag Winter Coats

The true test was whether the flattened bag could actually clear the 4″ space between the bed frame and the floor:

Ziploc Space Bag Under Bed 1

Yes! Storage conundrum solved!

Ziploc Space Bag Under Bed 2

After that victory, I became ambitious and experimented with the L and XL Cube-sized Space Bags in an attempt to recoup some storage space in our hall linen closet (which has become overrun with decorative pillows and down comforters).

Space Bag Pillows

Wait for it…

Space Bag Pillows 2

O.K., so the vacuum-sealed package isn’t exactly pretty, but it takes up significantly less space! In fact, by using 3 of these bags I gained almost an entire shelf of space in the linen closet! I’m officially a fan of the Ziploc Space Bag.

Linen Closet Before and After

I hope that this post inspires you to complete your seasonal closet clean out in preparation for the spring/summer months. Now go forth and organize!

 Want to learn more about Natalie Gallagher or Refined Rooms?  Visit www.RefinedRoomsLLC.com or connect via: Facebook Pinterest | Twitter | LinkedIn


Disclosure: Some of the links in the post above are affiliate links. This means that if you click on the link and purchase the item, I will receive an affiliate commission. Regardless, I only recommend products or services I use personally and/or with my clients and believe will add value to my readers. 

Featured post

Make Tax Organizing Less Taxing with These 4 Apps

Tax Preparation

Image © Depositphotos.com/miflippo

During the month of March, a number of professional organizers shared their top tips for tax time preparation on the NAPO Get Organized Blog. A common theme that emerges across the various blog posts is the need to keep up with your tax document organizing and record-keeping on a regular basis so that you avoid the overwhelm associated with tackling all of it in one giant batch process session during the beginning of each year.

I could not agree more with this! As a recovering “batch processor”, I can tell you that doing a little bit of tax organizing on a regular basis makes the entire tax preparation process significantly less stressful.

As most readers know by now, I am a bit of a techie; whenever possible, I like to use technology-based solutions to automate processes, work in a mobile environment, and keep the paper in my life to a minimum. Today, I’d like to share some technology-based solutions that I use in order to keep on top of my tax record-keeping on a regular basis throughout the year.

1. MileBug Mileage Tracker App

As a business owner, keeping track of my mileage is a necessity. Even if you do not own a business, you may choose to track your mileage for work reimbursement purposes, or for claiming a tax deduction for medical expenses and/or volunteer work. The MileBug app is my method of choice for capturing all of this information.

milebug 2

MileBug enables me to track and classify every trip I take with my vehicle, using either a manual entry odometer method, or GPS tracking. At any time, I can generate and email mileage reports to myself (or my accountant) in either an HTML or Excel-readable format. I can also back up my data to iTunes or other cloud storage services so that I won’t lose my information, even if I lose my device.

Tracking mileage is not easily accomplished in an end-of-year mega marathon documentation session. It really needs to be tracked on a daily basis, and utilizing a mileage tracking app such as MileBug makes the process infinitely easier.

2. It’s Deductible Donation Tracker App

Have you ever sat down with a stack of Goodwill donation receipts that spanned the previous 12 months and attempted to itemize every book, clothing and household item you donated? It’s not fun.

tax organizing 6

I used to itemize all of the charitable deduction information when I sat down to complete my taxes each year. After attempting to itemize the 8th donation drop-off receipt, I would throw up my hands and declare that the tax deduction was not worth the aggravation of of itemizing…can you relate? Even if I was willing to persist through this frustrating task until the last donation receipt was processed, the accuracy of the information would likely be questionable. After all, would I truly be able to remember each item that was in that box of “housewares” from 8 months ago?

So I got wise, capitalized on my penchant for a cool app, and downloaded It’s Deductible. The rest is history.

It’s Deductible actually makes record-keeping fun! It is available as both a web application and a mobile app. It provides a means of tracking cash donations, and household goods donations. For more information on how it works, see my blog post on keeping organized charitable contribution records.

Its Deductible app

When I am able to see my estimated tax savings after entering itemized donations each month, it provides all the incentive I need to keep up with this tax organizing maintenance task.

Its Deductible app 2

3. CamScanner App

Managing receipts is a necessary evil in the world of tax documentation. Business-related expenses, big ticket item purchases, medical expenses, home improvement expenses…all require a supporting document to legitimately claim those coveted tax deductions. A receipt typically serves that purpose. Trouble is, receipts fade, get lost, and create a tremendous amount of paper clutter in our homes.

In an effort to circumvent all of these challenges, I choose to scan my receipts as often as possible (yes, the IRS does accept electronic copies of documents). Oftentimes, I’ll use my Fujitzu Scansnap Scanner to transform receipts into electronic documents. When I’m not at my home office, I use the CamScanner app to quickly capture a receipt while on the go.

camscanner 1

This app basically transforms my smartphone into a portable scanner that creates both PDF or JPG documents that I can either email to myself or send directly to the appropriate folder in my Dropbox account. I then kiss that annoying piece of paper goodbye.

The maintenance task of scanning and filing electronic receipts is typically something I do daily. When my schedule reaches “crazy” level, I might batch process a week’s worth of receipts at a time.

4. GoDaddy Bookkeeping App

As a business owner, I like to have up-to-date information regarding my company’s financial information at my fingertips at all times. This enables me to clearly see where the business money is being spent, what my profit/loss cycles look like over the course of the year, how much I’ll have to pay in estimated taxes each quarter, etc. Having access to this data enables me to make good decisions.

I use GoDaddy Bookkeeping as my accounting program, and the accompanying GoDaddy Bookkeeping app to have access to my information on my mobile devices. It imports and organizes all of my business account information into a central location and enables me to generate income and expense reports.

Godaxdy bookkeeping 2

The beauty of this application is that there is very little manual data to input, since it pulls transactions directly from my bank account. The one exception is my mileage data, which I enter manually from the report I generate from MileBug on a monthly basis.

I invite you to test out one or more of these apps in order to make organizing your tax information a less taxing process for next year!

Want to learn more about Natalie Gallagher or Refined Rooms?  Visit www.RefinedRoomsLLC.com or connect via: Facebook | Pinterest | Twitter | LinkedIn

Featured post

Heidi’s Home Renovation Project Reveal

home reno reveal cover

Since my friend was kind enough to allow me to share the “in process photos” from her large home renovation project in my previous post on home renovation survival tips, it seems only fitting that I share the “after” photos with all of you as well. After all, who doesn’t appreciate a little interior design eye candy, right?

This renovation project encompassed almost the entire interior and exterior of my friend’s home, so I’m just going to focus on my favorite aspects of the project.  It would have been ideal to show you a set of before and after photos for each space, but unfortunately, I did not think to take a set of before photos before the project started.

This image does give you a sense of what the kitchen looked like before…just imagine a wall right behind the sink/dishwasher area, since that was the original exterior wall of the house (the entire area behind it is an addition which almost triples the size of the existing kitchen).

House Envy 1

Looks just a smidge different in the After photo below, eh?

The new kitchen certainly makes for an awesome entertainment space. I’m in love with the large butcher block table that extends off of the center island.
house envy 6

When designing her new kitchen, Heidi incorporated one of the latest kitchen design trends…a blend of contrasting cabinetry. The wood tones mixed with the painted cabinetry creates such visual interest.

house envy 8

As you can see in the above image as well as the image below, the new kitchen boasts a ton of display space to house all of Heidi’s collectibles. Don’t you just love glass front kitchen cabinets?

house envy 9

The new lighting is gorgeous, offering up just the right amount of drama for the space (note the accent lighting in the high display cabinets…sweet!)

house envy 7

Of course, as a professional organizer, I had no choice but to “ooh and aaah” over what is probably my favorite feature of the new kitchen…this custom-built family command center that serves as home for the family’s keys, electronics, and household papers. I love it so much, I’ll be stealing emulating this idea in my own kitchen redesign.

house envy 11

By now, you’ve probably noticed the new hand-scraped hickory flooring that was installed throughout the entire main floor of the home. Much to my delight, they carried the hardwood up the stairs, and installed these beautiful square-shaped newel posts that are totally in keeping with the new craftsman design. Did I mention that I’m also a sucker for iron spindles?

house envy 10

Let’s move onto the master suite…

Once again, this part of the house is a new addition, so there are no before photos to offer up. Prior to the renovation, the master suite consisted of an average size rectangular room with an average size connected bathroom located on the second story .

The new master suite is downright palatial. This wall of windows provides an amazing view of their secluded wooded property, which is so splendid, they opted to omit window treatments entirely.

house envy 2

Among the other elements of architectural awesomeness are the gorgeous wood beams that add interest to the vaulted ceiling…

house envy 3

…and the barn door that separates the bedroom from the bathroom. Who wouldn’t want one of these?

house envy 4

Ready to take a peek inside the master bath?

The “Mrs.” vanity is on the right side:

house envy 13

and “Mr.” gets his own area to the left:

house envy 12

As if it wasn’t awesome enough, here’s the “shower that’s as big as my laundry room”! Of course it contains dual shower heads, as well as a small seating area. Of course. (Is my house envy that obvious?)

house envy 5

This is the point where I so wish that I had taken before photos, so that you could truly appreciate the complete transformation of the home’s exterior. This image was taken after the new vinyl siding, roof, and front porch were completed. The addition of the front porch totally transformed the look of the front elevation, making it infinitely more charming.

house envy 14

Let us not omit the new garage doors, stonework, and lighting.

house envy 15
Phase I of Heidi’s renovation is now finished and took approximately a year to complete. They are about to embark on Phase II, which consists of completing the basement renovation, as well as the exterior landscaping. Although it was challenging for the family to live amid the chaos, she assures me that it was well worth it.

I know that I would be willing to endure the challenge if I got to wake up to that view from my bed every day. Can you see why I have house envy?

 Want to learn more about Natalie Gallagher or Refined Rooms?  Visit www.RefinedRoomsLLC.com or connect via: Facebook Pinterest | Twitter | LinkedIn

Featured post

Preparing for and Surviving Your Home Renovation Project

Renovation Survival Tips Cover

It’s been awhile since I posted on the blog.  I’ve been “off the grid” for a good portion of February due to the kickoff of our interior redesign project…yey! As you might expect, I will be blogging extensively about my own redesign experience in the coming months.

Today, I’d like to share the wisdom of my dear friend Heidi, who recently completed an extensive home renovation project.  Her family of four (+dog) lived in their home during the renovation process, which brings with it certain…um…challenges. In preparation for my own project (which will not be nearly as large in scope as hers), I asked Heidi to share her key tips to prepare for AND survive a home renovation project.

Mentally Prepare for Chronic Chaos

If you are the type who likes everything “just so”, you will seriously need prepare yourself nentally for the temporary change in lifestyle that goes hand-in-hand with living in a “Renovation in Process” environment.  You will need to adopt the mantra that “this too shall pass”, and regularly remind yourself that the end result will be worth it!

renovation survival 8

Minimize the Spread of Construction Dust

If your project involves drywall installation, carpentry work, or painting, there will be dust. Sawdust. Drywall dust. Paint spray dust…EVERYWHERE.  The dust migrates all over the place; you will find it in just about every room of your home. Although construction dust is inevitable, there are things you can do to minimize it.
Heidi suggests packing away items that you will not need access to during the renovation process, in order to prevent them from being coated with construction dust. Also, consider investing in magnetic air vent covers to use in the areas of your home that are not being renovated. Another good practice is to seal the doorway between your living area and the renovation area via heavy-duty plastic drop cloths.Renovation Survival Tips 2

Establish Your Storage Areas

Renovation projects require the removal of the “stuff” that typically lives in the space…furniture, appliances, home decor, etc. You will need a place in your home to serve as a temporary holding area for this stuff while the project is underway.

Heidi was fortunate in that she had several areas available for this purpose…a large area in her basement, as well as a spare bedroom.  If you don’t have room onsite for temporary storage, explore options such as relocating items to an offsite storage unit/family member’s home, or investing in an onsite temporary storage unit (e.g., PODS).
Renovation Survival 9

Prepared to Make Decisions…Quickly

You will be flexing your decision-making muscle on a daily basis when you undergo an extensive home renovation. Paint colors, flooring, cabinetry, lighting and counter top selections…oh my! Selecting finishes can be a daunting process for the average homeowner. You will often be called upon to make decisions quickly so as not to hold up contractors.

Begin your research as early as possible so that you are in a good position to make those critical decisions when it’s time to do so. If you lack confidence in the design department, enlist the assistance of a professional or a trusted friend who has a knack for design.

Renovation Survival Tips 6

 Order Materials ASAP

Be vigilant about ordering all materials necessary for your renovation as soon as possible. You never know when you will be faced with waiting for a backordered item that will prevent your project from moving forward. Once your project is at a standstill, the contractors move onto other projects, and it can be a painful process as you wait for them to incorporate your project back into their schedule.

renovation survival tips 7

Think Twice About D.I.Y. Efforts

You might be tempted to take on certain aspects of the renovation yourself, in order to save some cash. It makes sense to invest your sweat equity if you have expertise in a particular skill like electrical, plumbing, or drywall. If you are not an expert, you may want to think twice about D.I.Y.ing it. Heidi regrets their attempt at drywall patching (see below), and wished they would have left this piece of the project in the hands of the experts.

Renovation survival tips 5

Heidi’s final word of advise to me was to avoid letting your kids make paint color selections, or you might just end up with Kermit The Frog green in the hall bathroom! Of course, I already learned this lesson the hard way with my daughter’s room.

home renovation survival 4

Stay tuned for my next post, where you’ll get the opportunity to see the amazing transformation that occurred at Heidi’s home this past year!

 Want to learn more about Natalie Gallagher or Refined Rooms?  Visit www.RefinedRoomsLLC.com or connect via: Facebook Pinterest | Twitter | LinkedIn

Featured post

In an Organized World, Vertical Prevails over Horizontal Everytime

Stacks and Piles

While perusing through various organizing videos on YouTube yesterday, I came across this really awesome clip by Lorie Marrero, a professional organizer who many of you might know as the creator of The Clutter Diet.  In this video clip, she shared a key organizing tenet when it comes to organizing paper…“Vertical is visible, horizontal is hidden.

Certainly, most people can easily grasp the concept that it is much easier to retrieve paper when it is oriented vertically, rather than stacked in a pile.

For instance, it’s much easier for me to view my collection of sourcing catalogs and organizing magazines when they are stored in a magazine file:

vertical vs horizonal-in organizing (5)

…rather than simply stored in a pile or stack:

vertical vs horizonal-in organizing (6)

Of course, the same holds true for paper.  Would you rather search for a specific document this way…

paper piles

…or this way?

vertical vs horizonal-in organizing (4)

Visibility and therefore “findability” are enhanced, not only by the vertical orientation in this example, but from the use of labels as well.

The Clutter Diet tips video expands upon other ways that you can store paper vertically to avoid the perils of stacking. But what about using this concept in other areas of the home? I can think of two great examples of how simply repositioning objects so that they are stored in a vertical orientation can make accessing those objects infinitely easier.

Going Vertical in the Kitchen

During the course of organizing clients’ kitchens, I often find cupboards full of cookie sheets, muffin tins, cutting boards, serving platters and other large, flat items stacked in piles. For example, the cabinet pictured below initially contained a pull-out drawer that housed all of the client’s cutting boards and cookie sheets all stacked in a pile on the drawer. Her cake pans and cooling racks were nested horizontally in a stack on the cabinet floor below the pull-out drawer.

The client bemoaned the fact that she would often have to remove every item from the cupboard in order to access the one item she needed.  Although it pained me to remove a pull-out drawer (they are a great solution for accessing items in the back of the cupboard), it was warranted in this particular case. We used a vertical bakeware organizer to create a vertical storage solution for her bakeware zone. The height of the items we were storing required the removal of the drawer (you can still see the drawer runners in the photo below…they were eventually removed).

vertical vs horizonal-in organizing (3)

My client is ecstatic about how making this simple change dramatically has improved her baking and food preparation experience.

Going Vertical in The Bedroom

Ever try to locate your favorite tee shirt amidst piles and piles of horizontally stacked tee shirts in your dresser drawer? Once you’ve taken the time to organize those drawers by neatly stacking the tee shirts, how long does it take for them to become an unruly mess again?  Not long…especially if we are talking about your child’s tee shirt drawer!

Once again, the secret to solving this common organizing challenge is to flip those tee shirts on their side and “file” them in the drawer. Using a set of drawer dividers really helps to keep things under control even better. Now when your son goes to look for his Cleveland Cavaliers tee shirt, he can find it in a few seconds, without having to toss out half the contents of the drawer.

vertical vs horizonal-in organizing (2)

{How long would it take you to find the Cleveland Cavaliers tee shirt?}

For my readers who aspire to dresser drawer perfection, you can go the extra mile and use Pliio Clothing Filers to make your drawers “Pinterest-worthy”…

vertical vs horizonal-in organizing (1)

I’m sure I could come up with additional examples of the Magic of Vertical, but this post is bordering on too lengthy already. I’ll leave you with this last organizing mantra:

Stack and piles are the enemy of Organized.

 Want to learn more about Natalie Gallagher or Refined Rooms?  Visit www.RefinedRoomsLLC.com or connect via: Facebook Pinterest | Twitter | LinkedIn

Featured post

Does Your Partner Sabotage Your Organizing Efforts?

Unhappy Man and Woman

Image © Depositphotos.com /ginosphotos1

In my work as a professional organizer, there are many occasions in which my former career as a psychologist comes in quite handy. For example, a new client that I worked with for the first time this week expressed extreme frustration regarding the clutter that her spouse creates in their home.  She’s not alone.

I routinely come across situations where there is an inconsistency across spouses/partners with regard to the value they place on living in an organized home. I offer these words of wisdom to couples who find themselves in this situation:

Seek Counseling

If you and your partner have been dealing unsuccessfully with this particular point of contention in your relationship for an extended period of time, you will likely benefit from professional counseling to help open the lines of communication. It’s important to effectively communicate to your partner:

  • how you think the household disorganization is negatively impacting you/your household/your family
  • how having a more organized home can benefit everyone
  • what your specific expectations are for each area of the home

Hire a Pro

Since organizing is a teachable skill, it may be worth the investment to hire a professional organizer to assist your partner in learning new organizing skills (if s/he is open to it).  The organizer can triage the most problematic areas in your home, declutter, create systems, and provide instruction on how to maintain an organized state for those particular areas. You can find an organizer who works in your geographical area by searching the National Association of Professional Organizers’ online directory.

napo logo png

Learn to Compromise

As in any area of disagreement, the art of compromise should never be underestimated. Perhaps you can come to an agreement that the common or “public” areas need to be kept uncluttered and organized, and you’ll learn to accept disorganized bedrooms, basement, and closets.

Another way to compromise might be to reach an agreement that you will take on the role of resident “cleaner/organizer”, if your partner prepares all the meals and handles all the laundry. This way, you can each play on your strengths and preferences to work as a team in order to maintain the household in a way that is acceptable to everyone.

Designate a “Clutter-Free” Zone

Clutter-Free zone

If all else fails, designate a particular room or portion of one that can serve as your haven from the rest of the cluttered house.  Ask other family members to refrain from using the space (unless they are able to maintain its clutter-free status).

Do you and your partner experience “Clutter Clashes”?  If so, I invite you to comment on how you have successfully navigated through the conflict in your household so that others who struggle with this issue can learn from your experience!

Want to learn more about Natalie Gallagher or Refined Rooms?  Visit www.RefinedRoomsLLC.com or connect via: Facebook Pinterest | Twitter | LinkedIn

Featured post

Share Your “One Thing” for 2015!

2015 1 Thing Cover

It’s so easy to get swept up in the excitement of the new year, don’t you agree?

I have a history of being overzealous when it comes to my list of New Year’s resolutions. My tendency is to attempt to achieve too many goals simultaneously, which often results in a failure to achieve any of them.  Can you relate?

I smartened up over the last couple of years and started to heed the advice that I often give my clients…focus on just one thing at a time. 

In 2014, my one organizing goal was to improve the functionality of several closets in our home (the guest room and my daughter’s bedroom). So what is my One Thing for 2015?  Actually, it has nothing to do with tackling a space within my home.

Planning The Menu

For years, our family has struggled with the “It’s 4:00…What’s for Dinner?” Syndrome, which leads to a lot of unnecessary stress, unhealthy eating habits, and overspending. So my One Thing for 2015 is to consistently plan out and shop for our weekly meals ahead of time.

How can I increase the probability of meeting my goal/resolution?

Focus on the benefits I will experience as a consequence of achieving the goal

~  Less stress…since I will have a plan in place

~  More money…since we won’t have to eat take-out food by necessity any longer

~ Improved health…since planning meals enables me to make healthier choices for our family

Create a list of concrete action steps

  1. Create a “Master List” of meals that all (or most) of my family members will eat
  2. Identify a printable menu planning/grocery list to use as a tool for mapping out my weekly plan
  3. Incorporate a meal planning component into our weekly family meeting that occurs on Sunday evenings, so that I can get family member input
  4. Explore meal planning programs and apps, such as Emeals.com to determine if they might be useful (my kids are extremely picky eaters, so I’m pessimistic about the usefulness of such resources for my family)
  5. To the extent possible, batch process weekly food preparation (e.g., dice veggies, measure out portions) in a single hour-long session each Sunday

Enlist the help of an accountability partner

Communicating your desire to achieve a goal to other people and asking them to support you and hold you accountable throughout the process is one of the most powerful methods for helping you stick to your commitment.

Now that I’ve put my 2015 goal out there for all of you to see, I’ve got no choice but to achieve my goal!  I invite you to hold me accountable via blog comments, emails, and Facebook check ins. My plan is to write a follow-up post at the end of February to share my progress.

Now, it’s your turn.

I invite you to share your One Thing for this year below in the comments section. Perhaps it’s a chaotic space you’d like to tackle, a system you plan to implement in order to increase household efficiency, or a clutter-producing habit that you’d like to nip in the bud. I’d love to serve as your accountability partner in order to help you achieve success in 2015!

 Want to learn more about Natalie Gallagher or Refined Rooms?  Visit www.RefinedRoomsLLC.com or connect via: Facebook Pinterest | Twitter | LinkedIn

Featured post

Clutter-Free Options for Displaying Your Holiday Cards

One of the things I most look forward to each Christmas season is the daily arrival of holiday cards from friends and family. As the official household card maker for my own family, I understand firsthand the time, energy, and thought that goes into creating these cards each year. So I do my best to carve out a prominent place in my home to display the cards for everyone to enjoy throughout the holiday season.

Each year, I try to come up with a new and creative way to display holiday cards that doesn’t clutter up any of the flat surfaces in our home and that serves as a festive addition to the holiday decor. This year, I’m hanging them vertically on doors located in our foyer by attaching them to a long piece of ribbon that’s affixed to the door on the reverse side via duct tape (fancy, I know, but it works for me).

Clutter Free Holiday Card Display 2

If you are looking for some creative ways to display your holiday cards in “clutter-free style” this year, I pulled together this collection of great examples from around the web in order to provide you with a little inspiration.

Clutter Free Holiday Card Display

1.  Use garland and ribbon to create a hanging card display across a window or above a door, like the pom pom garland display featured on Bob Vila’s blog.

2.   Repurpose an old shutter to create a cardholder by tucking your cards in between the slats, as demonstrated by Courtney from A Diamond in the Stuff. Not only is this option fantastic for holiday cards — you can use it year-round to organize bills, coupons, invitations etc.

3.  Create a card wreath (or several!), using a wreath form covered in decorative fabric. Use clothespins to attach cards to the wreath form.  Genius!

4.  Use cards as Christmas tree ornaments! This is what I call “killing two birds with one stone”. See the simple tutorial at Better Homes and Gardens for how to pull this off.

5.  Don’t have a Christmas tree? Create a Greetings Tree, Martha Stewart-Style, using some dried winter branches, a bucket, and some ribbon.

6.  Hang cards vertically on doors and cupboards using pretty holiday ribbon like this example found on the Greener Grass blog  (great minds think alike!)

7.  Create a Card Garland on your stairway banister ala Martha Stewart.

8.  Create a Washi Tape Card Tree like the folks at the Thyme is Honey blog did. A conversation-piece indeed!

Now it’s your turn to share…got a creative way to celebrate those holiday cards? Let us in on it in the comments section below.

 Want to learn more about Natalie Gallagher or Refined Rooms?  Visit www.RefinedRoomsLLC.com or connect via: Facebook Pinterest | Twitter | LinkedIn

Featured post

‘Tis the Season for Clutter-Free Gifts!

Clutter-Free Holiday Gift Guide

As a professional organizer, I routinely find myself giving clients permission to let go of items that they have been holding onto solely because they were given the item as a gift. These are things that the client does not need, use or want…things that are taking up valuable space in their home because of a misplaced sense of obligation to the gift giver.

So as the holiday shopping season shifts into high gear, I wanted to offer up some advice to all of you gift-givers out there:

Don’t burden people with a gift that could likely end up in the “donations” box or the “re-gift” shelf of the bedroom closet.  

“Well, how can I avoid that?” you ask. Avoid it by giving a “clutter-free” gift…that is, a gift that is not a THING and doesn’t occupy space in the gift recipient’s home.

The professional organizing blogosphere is overflowing with posts that celebrate clutter-free gift giving. Just check out this month’s Professional Organizer’s Blog Carnival if you don’t believe me! There are countless clutter-free gift guides out there, so I thought I’d throw my hat into the ring and offer up some clutter-free gift ideas that will hopefully provide some direction if you are stuck on what to give that certain someone this year.

Feel free to print this list out for future reference – DOWNLOAD PDF FILE HERE

RR Clutter Free Gift Ideas

Share your favorite ideas for clutter-free gift giving in the comments section!

 Want to learn more about Natalie Gallagher or Refined Rooms?  Visit www.RefinedRoomsLLC.com or connect via: Facebook Pinterest | Twitter | LinkedIn

Featured post

Bringing Order to a Home School Space with Ikea Products

IKEA Home School Room Cover

As a rule, professional organizers tend to have a love affair with Ikea…and I am no exception! You’d be hard-pressed to find a better “one-stop-shop” for value-priced organizing and storage products anywhere. Spend a few moments on Pinterest searching for organizing ideas, and you will invariably come across countless illustrations of Ikea products creating organizational bliss in homes all across the globe.

Recently, I came across a blog post on BuzzFeed that showed some great examples of how a simple shopping trip to Ikea can enable you to organize just about any area of your home. It prompted me to think about the multitude of times that Ikea has come to my rescue when tackling various client organizing projects.

Perhaps the best example of this is a home school room that I designed last year. My client home schools her 4 children in an 11 x 11 foot room on the 2nd floor of their home. Given the small size of the space, I needed to use every the trick of the trade to meet all of my client’s objectives for this redesign. One “trick”that I definitely needed to implement was to maximize storage space by going vertical. What better way to do it than with trusty ol’ Expedit shelving units?

IKEA Home School Room 2

My client was lucky enough to purchase these units before they were (sadly) discontinued (FYI, Ikea’s replacement line of shelving is called Kallax, which is almost identical to its predecessor). The shelving units provide storage for teacher manuals, classroom manipulatives, student books/workbooks, and general teaching tools. We used Drona storage cubes in various colors to provide closed storage, and Kassett magazine files to corral teaching manuals and student workbooks.

IKEA Home School Room 3

The larger unit houses teacher materials, manipulatives and tools, while this smaller unit is designated strictly for student books and workbooks. The candy-apple red color really adds a fun element to the learning environment…you’ll notice that this accent color is repeated throughout the room. I love the fact that each child has their very own set of cubbies!

My client had her heart set on a reading nook in the new home school room. We created one in the corner using a Besta storage bench, which we topped with a cozy homemade cushion and pillow set. The childrens’ library books were stored in the cubbies beneath the bench, as well as on wall shelves that we fashioned out of inexpensive Bekvam spice racks (that were eventually painted red). The colorful picture books do double duty as wall art, adding a cheerful touch to the room.

IKEA Home School Room 4

Mom also requested that I create a designated place for the children to put their completed assignments. That’s where the Kvissle wall magazine holder came in! With five slots, there’s a place for each child’s work, as well as a bonus slot for Mom to tuck away her important papers.

IKEA Home School Room 5

Turning our attention to the other side of the room, we used this wall primarily for display space. We implemented one of my favorite solutions for displaying children’s art work…using a series of Dignitet curtain wires in conjunction with Riktig clips along the top portion of the wall. The lower portion of the wall was used to hang a fabric map and classroom calendar. A Kusiner wall pocket serves as a handy organizer for all of the various magnets and felt accessories that go with the map and calendar.

IKEA Home School Room 6

Last, but not least, let me show you where the kids spend a significant part of their school day…at this awesome “table” in the center of the room, which is actually comprised of 4 Micke desks. This space-saving desk configuration still enables each student to have their own individual storage space within their desk, even though it feels as if they are working together at a large table.

IKEA Home School Room 7

The Jules swivel chairs are not only appealing to the eye, they provide a way for the kiddos to burn off a bit of energy by engaging in chair twirling contests between lessons!

So…what did all of this Ikea organizational goodness cost my client?  Roughly $900. Money well-spent, don’t you agree?

What organizational solutions have you uncovered at your local Ikea store?

 Want to learn more about Natalie Gallagher or Refined Rooms?  Visit www.RefinedRoomsLLC.com or connect via: Facebook Pinterest | Twitter | LinkedIn

Featured post

Do These 8 Things NOW to Reduce Holiday Stress LATER

Reduce Holiday Stress2
When it comes to reducing the sense of overwhelm that generally accompanies the holiday season, the name of the game is “Do Things Early”. Today I’ll offer up a list of items that may be on your super-sized Holiday To Do List that you can focus on knocking out in the next week or two, in order to carve out more time for the festive aspects of the season come December.

1. Do the Deep Clean

Now is the time to clean your carpets and refrigerator, dust the blinds and ceiling fans, and disassemble your family room furniture to vacuum under the cushions! If you tackle the deep cleaning now, you’ll be ready to entertain guests after just a surface cleaning of the common areas come December.

2.  Declutter

November is the perfect time to declutter your closets as well as the kids’ playroom, in order to make room for the influx of new items that will be arriving in late December.

Decluttering also comes into play as you begin the holiday decorating process. Take time to review your holiday decor; remove any items that you haven’t used in the past few years from your collection. You can either donate the items, or consider hosting a “holiday decor swap” with your friends.

During your declutter frenzy, don’t neglect the kitchen! Declutter the refrigerator, freezer and pantry by tossing unused leftovers and expired items.  You’ll need to make room for all of the yummy holiday party food!

3.  Take inventory of your food

As we all know, food plays a significant role in our holiday celebrations, so expect to devote a bit more time and energy during this season for organizing and maintaining the areas that serve as home to your food items.

Once you’ve cleaned and decluttered the refrigerator, freezer, and pantry, take inventory of what food items you now have on hand. Knowing what you already have comes in handy when you begin preparing your holiday grocery shopping list. I actually recommend using laminated printable inventory sheets on a regular basis to assist with weekly meal planning (click on the image to purchase a set for yourself!).

Pantry Freezer Refrigerator Inventory Sheets

Source

4.  Prepare and freeze meals 

 During the holiday season, you may find yourself hosting an impromptu get-together with friends/family. It pays to cook and freeze a few one-pot meals now so that you’ll have an easy home-cooked meal on hand for these occasions.

5.  Organize your coupons

Go through your coupon collection and weed out the expired ones. Create a system for tracking expiration dates for those “great deal” coupons that you definitely plan to take advantage of as you begin your holiday shopping in the weeks to come.

6.  Take inventory of your gift wrap supplies

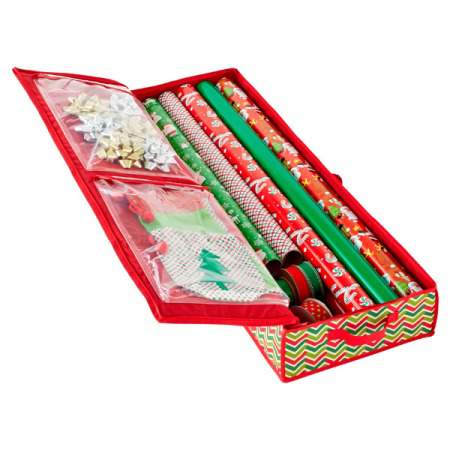
Now’s the time to ensure that you have a sufficient supply of gift wrap, gift bags, ribbon, and scotch tape on hand. If you don’t have a gift wrap station, go ahead and create one (see my previous post for ideas).

WrappyDeluxe-2T

Source

7.  Prepare holiday cards

If you choose to send out a holiday card, begin completing all of the sub-tasks associated with getting the cards in the mail…purchasing stamps, updating your card recipient address list, taking the family photo, etc. Even if you prefer not to send the cards out for another month, you can purchase/create cards, stuff and address the envelopes and have them ready for send-off now!

8.  Declutter your camera memory cards

Remove the memory cards from your cameras and video recorders, download the contents onto your computer and delete the images/videos from the memory cards in order to make room for all of the amazing images/video footage you plan to capture during the 2014 holiday season!

What other holiday tasks do you tend to complete in early November in order to get them off of your holiday To Do list?  Please use the Comments area below to share your tips with other readers!

Want to learn more about Natalie Gallagher or Refined Rooms?  Visit www.RefinedRoomsLLC.com or connect via: Facebook Pinterest | Twitter | LinkedIn

Featured post

Is Paper Clutter a Problem? Start by Reducing What Comes In

Tips for Reducing Paper Clutter 1

Image © Depositphotos.com /djarvik

With the advent of the digital age, many people assumed that we would naturally evolve into a paperless world. Nothing could be farther from the truth!

As a professional organizer, I can attest to the fact that paper clutter is a universal problem in our homes. Almost every organizing client I have worked with struggles with how to manage the constant influx of paper within their home and/or office. It comes at us from all angles…the mailbox, our kids’ backpacks, our shopping bags, and even our desktop printer. Paper clutter creates stress because it represents a plethora of unmade decisions and incomplete tasks that require our time and attention to process.

So what what’s a stressed-out paper clutter sufferer to do?

Begin by turning off the faucet.

Imagine trying to drink water out of a fire hydrant…pretty overwhelming, right?

powerful water flow coming out with impetus from a street red hydrant

Image © Depositphotos.com / FedeCandoniPhoto

In order to effectively take a drink out of the faucet, you first need to reduce the water flow to something that’s manageable:

Depositphotos_andrey1000

Image © Depositphotos.com / andrey1000

 The same holds true for paper! The first step in effectively managing your household papers is to reduce what’s coming into your home. The less paper that comes into your home, the less time required to organize and maintain your paper, and the more likely you will be to stay on top of your paper management system.

10 tips for reducing the paper “gush” to a manageable “drip”:

  1. Cancel subscriptions for newspapers/magazines/newsletters that you never read (research whether these periodicals are available online)
  2. Politely decline flyers and handouts offered by vendors/sales people (tell them your family is “going paperless”!)
  3. Avoid printing documents that can be accessed online
  4. Sign up to receive paperless bills/financial statements and take advantage of online bill pay services whenever possible
  5. Call your credit card companies and ask that your name and address not be sold to other companies
  6. Contact magazines/catalogs that you subscribe to and ask that your name and address not be sold to other companies
  7. When you donate money to a charity or order a product/service, ask that your name and address not be sold to other companies
  8. Don’t fill out warranty cards – they are a way to collect addresses for mailing lists. Your warranty is valid without submitting your information
  9. Avoid entering sweepstakes or contests. They are a way to collect addresses for mailing lists
  10. Take advantage of “Unsubscribe” resources devoted to reducing junk mail, including:

DMAchoice.org – Remove your name from the Direct Marketing Association’s marketing lists (represents approximately 80% of total U.S. marketing mailings)

CatalogChoice.org – Selectively choose the catalogs that you want to receive, as well as your preference for how frequently you receive catalogs

OptOutPrescreen.com – Opt out of credit card and insurance offers

Paper Karma app – Use this app to take a photo of unwanted mail and the app automatically contacts the sender and requests to them to remove you from their distribution list

paper karma

Systematically implementing each of these “unsubscribe” processes will require a bit of time and effort up front, but doing so will result in significantly less paper (and less stress) in your life!

 Want to learn more about Natalie Gallagher or Refined Rooms?  Visit www.RefinedRoomsLLC.com or connect via: Facebook Pinterest | Twitter | LinkedIn

Featured post

Project “Big Girl Room” Reveal

Big Girl Room Redesign (11)

In my previous post, I focused on the organization component of my daughter Grace’s recent bedroom makeover. It basically involved overhauling her closet with the installation of a customized Elfa closet storage system. Today, I’ll reveal how the decor of the bedroom was updated in an effort to transform the room into a space she can truly enjoy throughout her teen years.

When we moved into our home 9 years ago, my daughter was almost 2 years old, and I thought it would be fun to involve her in the process of decorating her new room. I allowed her to select the paint colors of the room and celebrated her love of sea creatures by creating a homemade stamped “sea life” border around the perimeter of her room.
Big Girl Room Redesign (3)

Room “Issues”

Although there are many aspects of the room that have stood the test of time beautifully (e.g., the furniture), there was room for improvement on several fronts. First, the bedroom was dark as a consequence of the magenta paint color and the window treatment.

Second, the green wall color choice was less than optimal (remember, it was chosen by a 2-year old after all). It’s difficult to appreciate how jarring the neon green walls were by merely viewing these photos. Although Grace really enjoyed it, the color was headache-inducing for me to say the least. And after 8 years, it was time to bid adieu to the sea life border.

Big Girl Room Redesign (1)

In addition, it was becoming increasingly apparent that my little trinket collector would require more display space than this mere 12″ x 12″ bulletin board would accommodate.

Big Girl Room Redesign (12)

Finally, we needed to address a few furniture placement issues and replace the bedding, since (although cute), her 5-year quilt had seen better days.

Redesign Objectives

So in a nutshell, the design objectives for this room were to:

1.  Lighten and brighten

2. Tone down the neon

3.  Create additional display space

4.  Improve room Flow

5.  Remove “Little Kid” elements

6.  Freshen up bedding

7.  Add fun pops of color

May I present the new and improved “Big Girl” Room…

Big Girl Room Redesign (2)

Objectives 1, 2, and 5 were achieved via painting the walls and replacing the old valence with a new one that’s narrower and mounted close to the ceiling line. I chose to paint over the magenta using the white trim color in order to unify the chair rail and the bottom portion of the wall. We vanquished the neon green by painting over it with a softer, fresher shade of green.

Big Girl Room Redesign (7)

In order to achieve Objective 3, I created a display wall by covering several cork bulletin boards with magenta-colored fabric that I scored from the remnant bin at Joann’s. My daughter wanted to add cork to the entire wall, but I thought that this would be more than sufficient. We relocated her original bulletin board to the interior of her closet.

Big Girl Room Redesign (9)

The room flow was improved by switching the original position of the vanity and bookcase. In the original configuration, it was difficult for my daughter to access the far side of her room because there was insufficient clearance between the bed and the vanity. With this simple repositioning,Objective 4 was met.

Big Girl Room Redesign (6)

Now for the fun part!  After an extensive search for bedding, my daughter and I fell in love with this funky duvet/sham set I found in the clearance bin for a grand total of $38! Can you tell I’m a sucker for the clearance bins yet?!? The bed skirt was yet another clearance find at Tuesday Morning.  I love love love it! Objective 6…CHECK!

Of course, the addition of the colorful bedding helps to achieve Objective 7, but we took it to the next level with the addition of the fun paper lanterns and ribbon in a variety of festive patterns and colors. We couldn’t resist these cute vinyl picture frames that offered a perfect dose of magenta “pop” on the bookcase wall.
Big Girl Room Redesign (8)

And for the grand finale, we spray painted the letters to match her funky new duvet cover. There you have it!

Big Girl Room Redesign (4)

I’m hoping that this will be the last time we will need to decorate this space until it’s time to transform it into my craft room once Gracie goes off to college!

 Want to learn more about Natalie Gallagher or Refined Rooms?  Visit www.RefinedRoomsLLC.com or connect via: Facebook Pinterest | Twitter | LinkedIn

Featured post

Bedroom Closet Makeover Reveal: Elfa to the Rescue (Again!)

Closet Reveal CoverIf you are a regular blog reader, you probably remember my Guest Room Closet Makeover Reveal  post from February of this year. In that post, I confessed that there are several areas within my own home that are crying out for an organizational overhaul. One such space was my daughter’s closet.

Although the closet is quite spacious, the space wasn’t being utilized to its maximum potential. Storage containers consisted of a mishmash of old, inherited furniture pieces, random plastic drawers, and cardboard boxes. To make matters worse, all of the clothing hangers were inherited from retail stores who give you their hanger along with your purchased garments.
Bedroom Closet Makeover (11)

Since the closet was fairly functional, redesigning/organizing it was a home improvement project that stayed on the back burner, until…
Bedroom Closet Makeover (3)

Once the front drawer of this 50-year old hand-me down piece fell off, I took it as a sign to move the closet makeover to the front burner. So the first task was to examine what I call the closet “skeleton” (a.k.a., its basic infrastructure) to see how I might improve upon it.  Here it is in all o

Bedroom Closet Makeover (12)Once again, here’s where the Container Store comes to the rescue! As you all know, I am a huge fan of the Container Store’s Elfa storage systems (read my Elfa post to learn why). I spoke with an Elfa design consultant by phone, and together, we arrived at a design that would work for my daughter’s storage needs. Her need for drawer space trumps her need for hang space, so our design incorporated a whopping eight Elfa Mesh Hanging Drawers. Our design also included an additional shelf that allows for out-of-the-way storage of items that are seldom accessed (e.g., memorabilia).

Container Store Sketch

So the transformation began with the removal of the builder-installed stationary shelves. I prepared myself for the inevitable ginormous holes that result from this process. Nothing that a lot of spackle and some paint can’t conceal!

Bedroom Closet Makeover (13)

Yes, that’s right. I said paint. I took advantage of the opportunity to add a fresh coat of paint to the closet walls when it was emptied prior to installing the new shelving.

Installing an Elfa closet system was a piece of cake; the Container Store walked me through each step of the installation process via their online video tutorials. I installed this on my own over the course of approximately 2 hours.

Bedroom Closet Makeover (2)

Ready for the “Before & After” shot?

Bedroom Closet Makeover (1)

By far, my favorite part of the “makeover” is the Elfa drawers. Unlike the drawer systems that I used in the guest closet (which were the freestanding type), these mesh drawers are built into the wall track system via a hanging drawer frame.

Bedroom Closet Makeover (5)

They glide open effortlessly, and provide more than enough space to store my daughter’s pajamas, t-shirts, sweatshirts, off-season shoe collection, and her assortment of purses and tote bags.  As you can see in the photo below, there was just enough room to squeeze in a cool square mesh hamper that I purchased on clearance at Target (score!).

Bedroom Closet Makeover (8)

We made use of the walls on either side of the closet system by installing several Command Hooks.  The hooks are used to hang my daughter’s scarves, robe, and Girl Scout vest. The right wing wall contains a cute cork board for her to use as additional display space in her room.

Bedroom Closet Makeover (10)

Did you actually think I was going to use that mismatched collection of plastic department store hangers?  Surely you jest. Who could pass up these adorable kid-sized huggable hangers?

Bedroom Closet Makeover (4)

One vestige of the original closet set-up that continues to work like an organizational charm is this over-the-door shoe organizer. This tool is one of the most versatile organizing products available. For this space, the many compartments are used to store small toys and trinkets that would normally invade all of the flat surfaces of my daughter’s room.

Bedroom Closet Makeover (9)

I typically opt for the clear shoe organizers, but I couldn’t pass up this opaque one when I found it on clearance. It was just a matter of labeling the compartments to ensure that items are returned to their proper home.

My daughter was so ecstatic about this closet makeover that she asked me for a bedroom “makeover” for her birthday gift earlier this year. It only took me 10 months, but I finally completed that project!  Be sure to check out next week’s blog post to see the Before and After photos…

 Want to learn more about Natalie Gallagher or Refined Rooms?  Visit www.RefinedRoomsLLC.com or connect via: Facebook Pinterest | Twitter | LinkedIn

Featured post

Redundancy and Automation are Key for Your Digital Photo Backup System

September is National Disaster Preparedness Month, and it’s that time of year when photo organizers everywhere are posing questions such as…
Digital Photo Backup
Did you know that September 27th is Save Your Photos Day? As a member of the Save Your Photos Alliance, I feel that I have a mission to educate folks about the importance of having a system in place to protect your digital photos/videos in the event of a catastrophic data loss. A catastrophic data loss can take on many forms, including the accidental loss/theft of your computer, the destruction of your computer as the consequence of a natural disaster, hard drive crashes, or even an epic computer hack.
Save Your Photos Day small
Creating a backup system for your digital photo and video collection does not have to be complicated or time-consuming.  When creating your system, you should  keep in mind the two key features of an effective backup:  redundancy and automation.

Your collection needs to be backed up in multiple places

There’s a saying in the industry that your data should not be considered backed up until it exists in at least three places. Redundancy is your insurance against Murphy’s Law and just plain bad luck. Hard drives go bad, devices fail, and cloud services go out of business. If one, or even two of these things happen to you simultaneously, you’ll still have a copy of your precious memories in back up #3.

Keep in mind that your backup copies also need to exist in at least two physical locations so that the offsite copy can serve as insurance in the event that your house burns to the ground or is leveled by a tornado.

The back up process needs to be automated

The more you can create a backup system that doesn’t require any manual processing on your part, the less opportunity there is for human error to enter into the equation. We are busy, overwhelmed, and (let’s face it) lazy at times. So using backup methods that work in the background without any effort on our part sets us up for success!

My 4-pronged approach for safeguarding your photo/digital collection

1.  EXTERNAL HARD DRIVE WITH BACKUP SOFTWARE

Purchase an external hard drive that includes pre-bundled automatic backup software. Your hard drive should remain continuously connected to your computer so that it maintains a consistent, real-time backup of your files (your digital photos/videos, as well as all of the other files that live on your computer’s hard drive). A typical 1 terabyte hard drive will cost approximately $100.
Hard Drive

2.  ONLINE “ALL PURPOSE” CLOUD SERVICE

There are many online data backup services to choose from, including Carbonite, Backblaze, and Mozy. I’ve used Carbonite for years and have been very satisfied with it.  I’ve experienced two catastrophic hard drive crashes in the past few years, and was able to retrieve my data seamlessly from the Carbonite cloud service both times. Take some time to research the options; just be certain that the one you choose backs up your files automatically.

3.  ONLINE DEDICATED PHOTO STORAGE SERVICE

I know what you’re thinking…a second cloud service? The all-purpose cloud services are great for a nuts and bolts backup, but if you have any desire to edit, organize, and share your photos, then I highly recommend uploading your photos and videos to a dedicated photo storage and sharing site as well. The only disadvantage is that for most of these sites, you’ll have to manually upload your files (but you’ve got an automatic backup in 2 additional locations, so it’s all good!). When choosing a service, here are a few important questions you may want to ask:

  • What is the cost involved for the size of my digital collection?
  • Are there any file size limitations?
  • Can I download my images in full resolution?
  • Can I control the privacy settings for my collection?
  • Do I retain ownership of my images?
  • What organizing and editing features are available?
  • Can I create photo gifts, products, and prints directly from the service?

Some of my favorite photo storage services include Forever and SmugMug.

4.  PRINT COPIES

Creating printed copies of digital photos counts as a back up method…believe it or not! Remember that a print photo can be scanned to create a digital photo in the future.

printed photos

Some might consider my backup method “overkill”, but when it comes to my family’s memories and our legacy, I feel like there is no such thing as being too cautious. If this 4-pronged approach feels like too much to take on, or if you are not the type who spends a lot of energy fussing over your photos, just complete #1 and #2 and consider your back up system complete.

If you’d like hands-on assistance with implementing your photo backup system, schedule a free phone consultation to learn how I can be of assistance to you.

APPO logo

Want to learn more about Natalie Gallagher or Refined Rooms?  Visit www.RefinedRoomsLLC.com or connect via: Facebook Pinterest | Twitter | LinkedIn

Featured post

Organizing Kids’ Art

Organizing Kids Art1

Now that the school year is in full swing, it’s the ideal time to set up systems for processing the various types of paper that you’ll begin to find in your child’s backpack on a regular basis. In a previous post, I proposed a system for handling school memorabilia.  Today, we’ll tackle the vexing problem of what do with all of that artwork .

Create an Art Gallery Wall

Find a place in your home where you can prominently display your child’s best pieces of art. Your kids spend a great deal of time and effort producing these gems; creating formal displays that go beyond the front of the fridge demonstrate to them that you value their hard work and creativity! Switch out the pieces on a regular basis as new art comes in.

Organizing Kids Art1
In addition to using traditional frames to create a kids’ art gallery in your home, you can get creative!  One of my favorite methods for displaying art is to use a simple wire and clip system on a long wall. I also love the Lil’ Davinci Art Cabinet, which provides another hassle-free way to frequently change out your art display.

 Designate a Temporary Holding Container

For artwork that isn’t quite “gallery-worthy”, designate a container for each child that will serve as a temporary place for all incoming art to be stored until the end of the school year. Make sure that the container is sufficiently large to accommodate oversized paintings and 3-dimensional pieces. I like to use under-bed storage boxes, since that’s where the holding containers live at our house.

Organizing Kids art 3

Review Your Collection at Year’s End

At the conclusion of the school year, take some time to sort through the holding bin with your child and determine whether the collection needs to be culled down prior to “archiving” it. As you review the collection, you and your child will likely identify pieces that are not significant to either one of you (e.g., coloring pages, etc.).

Give yourself permission to discard these and keep only the pieces that reflect your child’s talent, creativity, and interests. I recommend conducting this end-of-year review with your child; that way, you won’t be tossing any piece that is important to her (even if you don’t attribute any significance to it).

Archive and Share Each Year’s Collection

Once you’ve culled your collection, you may choose to keep the original art and store it in an archival quality container. Alternatively, you can archive the collection by creating digital images of each piece of art. I am a huge fan of this method.  Not only does it eliminate the necessity of devoting space in your home for storing tons of artwork, it opens up so many possibilities for sharing your child’s precious creations!

Artsonia

Artsonia enables you to upload your digital images to create an online art gallery to share with friends and family. It also serves as a “virtual museum”, in which your child can display their artwork publicly on the web. This service is available to parents, as well as school teachers!

Organizing Kids Art 4

Artkive

The Artkive app is another option for creating an online art gallery that can be shared with family and friends. Artkive is a free app that boasts some great organizing features, including the ability to categorize your art by school grade, child, and child’s age. You can even name each piece of art. In addition, you have the ability to produce a photo book of your child’s art collection with a few clicks of a button.

Organizing Kids Art 7

Photo Books

Creating digital images of your child’s art work enables you to take advantage of the dizzying array of online resources for creating digital photo books. Sites such as Shutterfly, MyPublisher, Snapfish, and Mixbook make it easy for anyone to create a photo book these days.

Organizing Kids  Art 6

You can create a digital photo book for each school year, or create larger books that curate art across several school years. I’ve created photo books for my children’s artwork using Artkive, Shutterfly and MyPublisher. These books can get pricey, so I suggest searching Groupon for current deals when you are ready to create your books.

Organizing Kids Art 7

Photo books are a terrific way to enjoy your child’s artwork for years to come…

Organizing Kids Art 8

 Want to learn more about Natalie Gallagher or Refined Rooms?  Visit www.RefinedRoomsLLC.com or connect via: Facebook Pinterest | Twitter | LinkedIn

Featured post

Using the Right Tools is Key to Maximizing Dorm Room Storage

College Dorm Organizing Product Roundup

A universal truth about dorm dwelling is that you will be living in much tighter quarters than you are accustomed to at home, AND you will likely be required to share your tight quarters with one or more roommates.  For these reasons, you will need to maximize storage space in your small corner of the campus.

Luckily, there are some great organizing and storage tools out there to assist you in taking advantage of every square foot of real estate within your dorm space. These tools will enable you to find storage space you didn’t realize you had in unexpected places, such as:

In The Desk “Zone”

1.  Rolling Drawer Cart:  One area that you may not have considered when hunting for additional storage space is the area under your desk. Use a rolling drawer cart to store everything from office supplies, electronics, to food.  Simply roll it out and slide it over temporarily when you are seated at your desk.  Sterilite 3-Drawer Wide White Cart

2.  Desk Hutch:  An add-on desk hutch (specifically sized for a dorm desk) takes advantage of vertical space above your desk, without the need to fasten something to the wall (which is typically prohibited).  It provides a place to house your text books, notebooks, etc. without sacrificing work space on your desk surface.  Classic Dorm Desk Bookshelf

3.  Desk Chair Storage Pocket:  When space is at a premium, you need to “think vertical” and store items in creative ways. For example, using a chair storage pocket takes advantage of the “dead space” on the back of your desk chair, which can be used to store small items such as notebooks, pens/pencils, and electronic devices.  Aussie Pouch Chair Pocket

 On the Back of Doors

4.  Over-the-Door Shoe Organizer:  The backs of doors are the most overlooked area for finding hidden storage space. One of my favorite general organizing tools is the over-the-door shoe organizer. It can be used to store just about anything…food, jewelry, accessories, electronics, and yes, even shoes. Be sure to opt for one that has clear pouches, since visibility is key. 24 Pocket Blue Shoe Organizer

5. Over-the-Door Towel Holder:  Dorm dwellers need to store their wet towels in their dorm room. What better place to stow them out of the way than on the back of your door!  4-Swing Rack Towel Holder

In the Closet

6. Double Hang Rod:  New dorm dwellers will likely be shocked to discover how tiny their dorm room closet is. Take heed! There are a number of ways to maximize space in the closet. If you hang the majority of your clothes, you will definitely want to take advantage of a double hang rod. It does precisely what its name implies…it literally doubles the size of your hang space.  Closet Doubler

7. Slimline Hangers:   Slimline or “huggable” hangers are a must in your dorm room closet. Their ultra-slim profile will enable you to maximize the number of garments you can hang in that tiny closet.  Joy Mangano Huggable Hangers

In the Bed “Zone”

8. Bed Risers:  My #1 piece of advice for maximizing dorm room storage space is to raise your bed off the floor so that you can utilize the space underneath it. The best case scenario would be to loft the bed high enough to create usable living space underneath it. If this is not an option, utilize bed risers to raise the bed high enough to accommodate under-the-bed storage containers. Colored Bed Risers

9. Bedside Storage Caddy:  You will likely need to go without a nightstand as a dorm dweller. The bedside storage caddy is your new place for housing those “nightstand” items, such as glasses, books, reading light, tissue, etc. Bedside Storage Caddy

On the Walls

10. Wall Organizer: Although you may be tempted to use your walls strictly for displaying decor, be sure to earmark some of the wall space for vertical wall-mounted storage solutions, such as a wall organizer. These can do wonders for keeping desktop paper piles at bay! Smead Cascading Vertical Wall Organizer

11. Adhesive Hooks:  One ironic aspect of dorm dwelling is that you’ve never needed to use wall space more, BUT you are typically prohibited from using any type of permanent fastener to hang items on the walls.  That’s where adhesive hooks come to the rescue! Be sure to pack a bucketful of adhesive hooks in a variety of sizes.  You will be shocked at all of the items you can hang on your walls and doors, as well as inside the walls of your closet (robes, jackets, belts, hats, keys, purses, totes, etc.) using hooks. Command Hook

 Want to learn more about Natalie Gallagher or Refined Rooms?  Visit www.RefinedRoomsLLC.com or connect via: Facebook Pinterest | Twitter | LinkedIn

Featured post

College Prep: How to Prepare for Dorm Room Living

Young learning girls smiling at camera

Photo © Depositphotos.com / Candy Box Images

Planning and preparation are the keys to success in so many aspects of our lives, and preparing for your new life as as dorm dweller is no exception!  Begin the planning process by gathering as much information as possible about your new “home away from home”.

Research Your New Digs

Luckily, we live in an age where new students can find out everything they need to know about their dorm space well in advance of move-in day.  Most colleges and universities provide detailed information regarding student housing on their websites (see my alma mater for example). In addition, you can usually visit an actual dorm room during a campus tour to get a first-hand glimpse of a typical dorm room.  Here’s a list of key questions to ask during this information-gathering phase:

      • What is the size of the overall space/common areas/private areas?
      • What furniture does the college provide?
      • To what extent can the furniture be reconfigured?
      • What storage space do I have for clothing (dresser and/or closet)?
      • Will I be sharing a closet?
      • What is the size of the bed (to ensure you bring the correct size of bed linens)?
      • Will I be allowed to secure items to the wall?
      • Am I allowed to utilize the backs of doors for storing items?

      College Dorm Floor Plan Flickr CC

      CC Image Courtesy of University of Tennesee on Flickr 

      Determine What to Pack

      Knowing what furniture comes standard with the dorm room is the first step in helping you determine what you need to bring along. The next item on your “to do” list should be to communicate with your future roommate(s) in order to iron out agreements concerning what items you are willing to share in your common area in an effort to avoid duplication and save space (do you really need multiple microwaves and televisions?)

      When you start to create your packing list, be realistic about what items will “make the cut”, since you need to operate in significantly less square footage than you have at home.  There are several great dorm room essentials checklists such as the ones provided by DormSmart and  RealSimple.  Once you review the extent of “essentials” on these checklists, you’ll soon realize that your drum set is not coming along with you.

      Dorm Room checklist_89Studio (2)

      When it comes time to pack your clothes, avoid the temptation to pack your entire wardrobe.  Instead, take only your in-season clothes and plan on swapping them out for your winter wardrobe during the holiday break.

      Organize While You Pack

      When you arrive on campus that very first day, there will be so much to do and discover.  The last thing you will want to devote time to will be unpacking and organizing your belongings.  Do yourself a huge favor by allowing plenty of time on the front end to pack your belongings in an organized manner.

      Group like items in storage containers (e.g., office supplies, personal care, electronics, linens) and clearly label your containers.  With the floor plan and/or room photos in hand, give some thought as to where you will store each group of items within your dorm room during the weeks prior to move-in day. By following these simple steps, your unpack process will be a breeze!

      College packing Flickr CC

      CC Image Courtesy of Sheila C. on Flickr

       Be sure to check back soon to read about the “Must Have” dorm room organizing products I recommend for maximizing space and corralling your essentials…

       Want to learn more about Natalie Gallagher or Refined Rooms?  Visit www.RefinedRoomsLLC.com or connect via: Facebook Pinterest | Twitter | LinkedIn

Featured post

Designer Trick: How to Hang Drapery Panels for Maximum Impact

Want an easy way to achieve a designer look in your living space?  Pay attention to how you hang your drapery panels.  A common designer trick is to hang drapery panels “high and wide” for maximum impact.

Take a look at this great illustration, which shows a rendering of drapes hung short and close verses those hung high and wide…

Homegoods illustration drapery

Source

Same window, buy very different look.  Don’t you agree?

Hang ’em Wide

Extending the curtain rod three to six inches beyond the frame on each side provides many decorating “benefits”. Not only does it beef up a window’s focal point potential, it allows extra light to flood the room (especially important when staging a home for sale) as well as enabling a clear view of the outdoors. If you are lucky enough to have beautiful window mouldings, you can hang your drapery panels wide enough to show them off.

 Hang ’em High

When you hang drapery panels closer to the ceiling line rather than at window trim height, it creates the illusion of grandeur in the form of a higher ceiling.  Don’t believe me?  Take a look for yourself…

curtain designer trick 1

Here’s another “Before” and “After” from my design files that illustrates the dramatic effect of this simple change…

curtain designer trick 2

In order to achieve this look, you’ll either have to modify standard 84″ panels by adding on a coordinating material to lengthen the panels (click here for a tutorial), or purchase 96″ drapery panels.  Some great resources for purchasing 96″ panels include:  West Elm, Bed, Bath, and Beyond, Overstock.com, ZGallerie, and Target.

Although my preference is to hang the panels as high as possible, you can choose to hang them within a few inches of your ceiling line,or half way between the top of your window trim and your ceiling line.  Whatever you choose, be sure that the bottom of the panels skim the floor.

Let me leave you with some additional examples that demonstrate how proper panel placement can add style and visual interest to your room!

drapery round up

Photo credits:

1 – Relaxdeco.com

2 – Loomdecor.com

3 – Tarafree.blogspot.ca

4 –  OneKingsLane.com

5 – Indulgy.com

6 – Elledecor.com

7 – Homegoods.com

8 – Betterhomesandgardens.com

9 – Myhomeideas.com

 Want to learn more about Natalie Gallagher or Refined Rooms?  Visit www.RefinedRoomsLLC.com or connect via: Facebook Pinterest | Twitter | LinkedIn

Featured post

Is Self Storage The Answer?

unit storage

Photo © Depositphotos.com / Andrea Crisante

The Self Storage Association’s 2013 Fact Sheet presents some staggering statistics regarding the self storage “epidemic”:

  • Approximately 1 out of every 10 U.S. households currently rents a self-storage unit (which translates into 21 square feet of self storage space per household)
  • Self storage facilities report an average 85% occupancy rate
  • 30% of self storage renters have rented their unit for more than 2 years

On more than one occasion, I’ve had a client who has wondered whether a self storage unit might be an appropriate solution to decluttering their home. My answer?  I believe that self storage can be a smart solution in certain circumstances…those that involve a circumscribed time frame with a clear end date. For example, I may suggest self storage for staging clients who have an excessive amount of furniture, clothing, and household items that need “edited out” in order for their property to show well while on the market.

When to Consider a Self Storage Unit

Self storage can also be quite useful for people who are “between homes”, such as those who are building a home and have had to vacate their former home before the new home is ready for occupancy. Another situation where a self storage unit may come in handy is during a major home renovation, in order to protect your belongings from the inevitable construction dust storm. For those who are temporarily moving cross country or overseas as a consequence of a job transfer or military deployment, self storage is a great solution for temporarily housing your belongings.

Situations Where a Self Storage in NOT a Good Solution

self storage

Photo © Depositphotos.com / Andrea Crisante

When is self storage a bad idea? When you are using it as a cop out for avoiding the hard work associated with decluttering.  When you simply don’t feel like making the tough decisions about what should stay or what should go. When you don’t have a clear endpoint in mind for when you will remove the items out of storage.

There is a cost associated with keeping and storing things, whether it’s in your own home or somewhere else. The typical rent for a 10×10 (non-climate controlled) storage unit is $115/month. That’s a pretty hefty price to pay for storing items that you may use someday…that you don’t necessary use or like.

One of my clients recently decided to clear out her storage unit that she’d kept in excess of 12 years.  It was heartbreaking to learn that the vast majority of the contents consisted of items that she did not need or want.  Since she hadn’t accessed the unit in several years, she didn’t even remember what was in the majority of the boxes. She estimated the total cost of storing her unit “full of junk” to be somewhere in the vicinity of $13,000 over the course of those 12 years.

Don’t let this be you.

Want to learn more about Natalie Gallagher or Refined Rooms?  Visit www.RefinedRoomsLLC.com or connect via: Facebook Pinterest | Twitter | LinkedIn

Featured post

Hot Organizing Tools Featured at the NAPO Organizing Expo – Part 1

napo 2014 banner

I just returned from Scottsdale, Arizona, where I attended the NAPO (National Association of Professional Organizers) conference, along with 500+ professional organizers from all around the world. The NAPO conference provides continuing education regarding best practices in the organizing industry, as well as a wonderful opportunity to learn about the dizzying array of organizing products/tools and storage solutions that exist in order to assist clients with their particular organizing challenges.

As part of the conference “debriefing” process, I wanted to highlight some of the products I came across at the Organizing Expo.  In today’s blog post, I’ll present some great tools for organizing clothing, gift wrapping supplies, and vital documents.

 1.  Organize Your Clothes with Pliio 

One of the first products I discovered on my foray into the Organizing Expo Hall was the Pliio Clothing Filer. This product totally plays into my OCD tendencies. Do you struggle with maintaining order within your dresser drawers or closet shelves?  The Pliio Clothing Filer is a tool which makes it easy to fold your clothes and store them in perfectly uniform piles or stacks. This enables you to easily see all of the garments that you own. The structure makes putting away and retrieving clothes effortless.  L-O-V-E it!

Pliio_Before_AND_After_450_png

Here’s professional organizer and Pliio co-creator Clare Kumar demonstrating how to use Pliio at the conference:

Pliio
Not only does the Pliio system reign in clutter at home, it is also a useful tool for keeping the clothing in your suitcase uber-organized while traveling. Pliio comes in several sizes to accommodate various types of garments, including children’s clothing. You can purchase them at Bed, Bath, & Beyond  or The Shopping Channel.

2.  Organize Your Gift Wrap Supplies with Wrap iT

Raise your hand if you have struggled with keeping all of those gift wrap rolls and supplies corralled and organized. I have.  In fact, I wrote a blog post on it not too long ago. For those of you with your hands raised, I’m happy to introduce you to Wrap iT, the all-in-one solution for organizing all of your gift wrap and wrapping supplies. Wrap iT is available in both a regular and a deluxe size. Both options hold up to 26 (yes, 26) rolls of wrapping paper, but the deluxe version can accommodate oversize rolls. There are a number of storage compartments designed to hold gift bags, tissue paper, ribbons/bows, tape and scissors…everything you need to create a gorgeously packaged gift.

As creator Adam Levine demonstrated at conference, the Wrap iT includes a unique system for storing wrapping paper rolls to prevent those annoying frayed/damaged edges that can often occur when rolls are stuffed willy nilly inside the closet or under the bed.

Wrap It NAPO 2014

The best part about Wrap iT is that it stores so much in so little space! When hung in the closet, Wrap iT takes up about as much space as a suit jacket. If you don’t want to hang it in the closet, its slim profile enables you to simply tuck it away underneath a bed. I love this product so much that I plan to become an affiliate and sell it in the Recommended Products page of my website! Until then, you can purchase it directly from the Wrap iT website.

 3.  Organize Your Vital Documents with LifeinCase

I spend a great deal of time working with clients to organize their “paper life”. One of the overriding goals we strive to achieve together is to create systems for easily retrieving important documents (for them or for their loved ones) in the event of an emergency.  Whether the situation takes the form of a medical emergency, a sudden death, or a natural disaster, it is crucial for everyone to have a way to quickly find the important documents.

The makers of LifeinCase recognized this need and created a ready-made system that makes it quite easy for anyone to gather their essential documents and have them ready to “grab and go” in the event of any emergency.

Life In Case - NAPO 2014

LifeinCase is an organizational tool that’s comprised of:

  • 5 Plastic Folders: To hold Personal, Medical, Financial, Estate, and Property records
  • Checklists:  Summarizing the 50 essential documents that should be stored in each of the 5 folders
  • Grab-and-Go Tote:  500 sheet capacity that’s small enough to be portable, yet larger enough to hold all essential documents

LifeinCase comes in multiple patterns and colors and is available on their website.
Stay tuned for the next post, where I’ll be describing cool time management and productivity tools from the NAPO 2014 conference!

Want to learn more about Natalie Gallagher or Refined Rooms?  Visit www.RefinedRoomsLLC.com or connect via: Facebook | Pinterest | Twitter | LinkedIn

Featured post

Solutions for “Ugly Mirrored Closet Door” Syndrome

Mirrored Closet Doors Cover

A client recently hired me to revamp her master closet and dressing area, in preparation for putting her home on the market later in the year.  She’s a savvy homeowner who plans to invest in a few key updates in order to make her property (which was built in the early 70’s) as appealing as possible to buyers.  This area of her home boasts several great features, including this built-in storage area:

Closet built-ins

An element of the space that will NOT appeal to buyers in its current state would be the floor-to-ceiling smoky-mirrored closet doors:

Mirrored Closet Doors

In order to stage this space properly for resale, those doors have to go.  Our budget would not allow for new doors; therefore, we explored several potential creative fixes. One solution was to utilize some type of wall covering to transform the doors, such as this awesome grass cloth example:

doorside

Source

After conducting a Pinterest search, we came across this brilliant idea of employing some type of opaque window film to create a more updated look, working with the mirror instead of covering it up:

frosted design

Source

After we made the decision to remove the central shelving unit from the closet to maximize hang space, we realized that neither of these solutions will work for our situation, since the existing doors would not close off the entire length of the closet. Back to the drawing board!

Like it has in so many previous Refined Rooms projects, Ikea comes to the rescue with a low-cost solution for our closet door woes (oh, when will Northeast Ohio get an Ikea store?)

ikea panels 2

I’ve most often seen Ikea’s panel curtains used to replace hideous vertical blinds, but they can also be used as a room divider, as well as in place of a door to hide open storage. Ikea offers 18 different panel designs, ranging in price from $4.99 to $14.99 per panel.  For this particular project, the total cost of panels and hardware comes to around $80…significantly less than new doors.

The client was sold on this solution immediately and will be ordering and installing the panel curtains in the coming weeks. I promise to post the “after” photos when the closet makeover is complete. Until then, I’ll leave you with this visual…

ikea panels

Is there a place for Ikea panel curtains in your home? Hop on over to their website and check out all of the snazzy designs they have available.  Maybe one of them is right for your space.

Interested in learning more about Natalie Gallagher or Refined Rooms? Visit RefinedRoomsLLC.com.

Featured post

Garage Organization 101: Tips from a Local Professional

 Now that Polar Vortex 2014 is becoming a distant memory, we are all anxious to roll up our sleeves and begin sprucing up the exterior areas of our homes. Of course, we all know that spring is the ideal time to give the garage an organizing “overhaul”. In order to assist with the process, I invited Paige Norton of Top Shelf Transformations to provide some basic tips for banishing garage clutter and creating a functional space that you can be proud of this spring!

Monkey Bars

Make Decisions:

When you begin to go through the items in your garage, think about how often you use them. If you haven’t used an item in the last few years, you probably won’t use it in the future. Separate your items into “keep” and “toss” piles.

Once you’ve decided what to keep and what to toss, consider donating those items in the toss pile to your local charity. Donating gently used items to a local charity is a great way to recycle and give back to your own community. Now that you’ve gotten rid of unnecessary clutter, it’s time to organize what will remain in the garage.

Separate and Categorize:

Now that you’re left with the essentials, it’s time to separate them into specific categories such as: sports equipment, seasonal items, tools and yard equipment. Storing multiple items together into a category will help you identify their whereabouts easily when needed.

Once you’ve separated your items into specific categories, you will then need to assign them to a spot in the garage. Think about how often you use each item. Seasonal and holiday items are used only a certain amount of times per year and should be stored out of the way. Yard equipment, tools and sports equipment are used more frequently and should be stored in an area of easy access.
Monkey Bars 2

Maximize Space:

To maximize your available storage space, consider storing things up high on walls, above windows and doors and hanging from the ceiling. Utilizing these typically unused overhead areas allows you to take advantage of all the potential storage space your garage has to offer and keeps things up off the floor. As mentioned before, seasonal, less-frequently used items should be stored out of the way. Utilize overhead racks and shelving to store things up out of the way while still allowing for easy access to them when needed.

More frequently used items such as tools and yard and sports equipment should be stored in an area where items are easily accessible. Hang these items lower on walls and in cabinets for easy daily access.

Select the Right Storage Containers:

Avoid storing things in cardboard boxes. Sturdy, plastic bins are easier to stack and protect your items. Use clear plastic bins to help you easily identify the contents, or clearly label each bin.

Select the Right Storage System and Accessories:

Everyone’s storage needs are different. After separating your storage items and deciding where to store them, it’s time to decide how to store them. There are many storage solutions out there. Shelving, hooks, racks and cabinets are all great options for storing items up off the floor. Select the system and accessories that fit your specific storage needs and maximize your particular garage layout.

~~~~~~~~~~~~~~~~~~~~~~~~~~

Garage Organization Giveaway!

Now that you know the steps to complete your garage “makeover”, I invite you to head over to the Refined Rooms blog and enter to win a fantastic garage organization tool from Monkey Bars Storage. Refined Rooms is giving away a Garden Tool Rack to one lucky blog reader!

Giveaway Collage

Paige Norton is the Community Manager at Top Shelf Transformations, Northeast Ohio’s exclusive, authorized dealer of Monkey Bars Garage Storage Systems. Top Shelf Transformations provides expert garage storage and organization solutions.

If you’d like to learn more about Monkey Bars Garage Storage Systems, you can find them here:
Facebook  |  Twitter  |  Google+  |  Pinterest  | YouTube

Featured post

Introducing Freedom Filer: The Solution for All of Your File System Woes

Freedom Filer 1

Image courtesy of John Kasawa / FreeDigitalPhotos.net

We are nearing the end of Organize Your Files week…

Does the task of organizing your files sound about as appealing as getting a root canal?

Perhaps you dread the task of filing papers into your current filing system because the filing cabinet is overstuffed and hasn’t been purged in years. Maybe that dread prevents you from filing altogether, and you have resorted to piling your papers in stacks throughout your home instead.

freedom filer 3

Image courtesy of  Nutta Kit /FreeDigitalPhotos.net

If any of this resonates with you, first understand that you are not alone!  As I’ve discussed in prior blog posts, paper clutter is a common challenge for most of my clients – so much so, that I offer an organizing service specifically devoted to assisting clients with managing the paper that comes into their home.
One of my absolute favorite tools for managing household papers is the Freedom Filer system.

Freedom Filer 5

I use Freedom Filer for organizing my own reference files, as well as my clients’ files.  My clients love it as much as I do.  Here’s why:

    • It’s a self-purging system in which files are categorized as Permanent, Replaceable, or Rotating…so you will never have to clean out your files again once the system is set up (take a few moments and let that sink in);
    • Following some simple rules, all of your files will rotate out after their useful life has ended;
    • Color coding enables users to quickly retrieve documents;
    • You will not have to waste any time creating labels or determining appropriate file categories/names…it’s all been done for you;
    • You can completely customize the system to fit your specific filing needs.

Click here to link to the Freedom Filer site, where you can learn more about this highly recommended product.  After you purchase your Freedom Filer, contact me to schedule a session during which we can set up your customized filing system and end those paper piles once and for all!

To learn more about Natalie Gallagher and Refined Rooms, visit RefinedRoomsLLC.com.

Featured post

Junk Away: An Invaluable Resource for Your Large Declutter Project

In celebration of Earth Month/National Recycling month, I thought it would be appropriate to shine the spotlight on a local business that promotes “eco-friendly services” as one of its core values.

Earlier this week, I had the opportunity to get an “insider’s tour” of this really amazing place…

Junk Away010127

 Junk Away is a Medina Ohio-based company, owned by one of my NAPO North Coast Ohio Associate Member colleagues, Doug Lewis. This junk removal/hauling company’s motto is:

Junk Away Reception 2

The company works with clients who are tackling major declutter/clean-out projects in their homes or businesses.  Their objective is to make the process as quick and painless as possible for their customers. A project that might take you a a few weeks to tackle on your own can likely be completed by the Junk Away team in one afternoon.

Doug Lewis, Junk Away Owner

What impresses me most about Junk Away is their commitment to avoid dumping your discarded items into the landfill.  Over 70% of the items they haul away are recycled, donated or re-sold.  Quite impressive!

When a full truck of “junk” arrives at the sorting facility, the discarded items are sorted into various categories.  Each category of items has its own unique disposition.  For example, this pile of wood will be used to make mulch:

Junk Away Wood

Metal items will find their way to the local metal scrap yard for recycling:

Junk Away Metal

Old electronic equipment is donated to local organizations who have a use for it; what is no longer useful is disposed of properly via local e-waste companies:Junk Away Ewaste

“Junk” is truly a misnomer for certain items that make their way into the Junk Away sorting facility.  Collectible items and items of value are re-sold to local dealers and consignment shops. Today’s truckload included this fully functional riding mower:

Today's truckload included this fully functional riding mower

You never know what might arrive on the truck each day. Here’s a grouping of vintage items and “objects d’art” awaiting resale:

Vintage items and "Objects d'art" awaiting resale

I was tickled to discover that Junk Away’s reception area and staff offices are furnished and decorated exclusively with “junk truck” contents!

Junk Away Reception 1

I’m thinking of hiring Doug as my home staging assistant…what do you think?

If you are a Northeast Ohio resident who will be tackling a major declutter project in your future, be sure to give Junk Away a call to see how they can assist you.

Interested in learning more about Natalie Gallagher or Refined Rooms? Visit RefinedRoomsLLC.com.

Featured post

Become an Organized Maxxinista! Shop T.J. Maxx for Inexpensive Organizing Tools

Part of the job description of a professional organizer is to know where to buy various organizing products for the best possible price.  When you’re in search of containers and tools for corraling your clutter and maximizing your space, some typical places that you might shop for these items include Target, The Container Store, and Lowes.  But did you ever think to scour the back aisles of your local T.J. Maxx?  You might be very surprised at the treasure trove of organizing goodies you will find.

Of course, there are the “usual suspects” that you might expect to find, like this smorgasbord of attractive baskets.  The possibilities for organizing with open-top baskets such as these are endless:

TJ Maxx Organizing Products 9

Looking for a way to contain your kids’ toys in a stylish way?  Why not pick up a few of these large containers…

TJ Maxx Organizing Products 4

Now for the unexpected…

TJ Maxx Organizing Products 14

Search those back aisles and you will discover organizing products for every room in your home!  For example, in the aisle featured above, I spied a rack to use in the kitchen cupboard for vertical storage of cookie sheets/cutting boards, a drawer organizer for dressers, a shoe organizer (this product offers a universe of organizing possibilities), as well as a closet organizer for sweater storage.  Can you say SCORE?!?

So let’s say you are in the process of organizing your bedroom.   What might you uncover at T.J. Maxx that would be useful for your project?  Let’s start out with your closet.  Non-slip hangers are a must for maximizing space in a small closet.  In fact, these hangers made my “Top 10 List of Organizing Products”.

TJ Maxx Organizing Products 3

If you are a regular reader of the Refined Rooms blog, you may remember these cute little numbers that were featured as part of the Refined Product Best Pick series.  These jewelry and scarf organizers might come in handy as part of your closet organization process as well.

TJ Maxx Organizing Products 2

You might also find bed risers and under the bed storage containers; these tools would enable you to take advantage of the square footage under your bed for storing off-season clothing, or other items that you access infrequently.

TJ Maxx Organizing Products 8

The Cap Rack is another useful gadget for organizing baseball hats in your bedroom closet (or on the back of any door or wall space for that matter).

Got a kitchen organizing project in your future?  Move one aisle over at T.J. Maxx and you may uncover some hidden gems, such as these plastic dry goods containers for your pantry (although I would recommend avoiding the round containers and selecting the square/rectangular containers instead, since they waste significantly less space).

TJ Maxx Organizing Products 5

I must say that my heart went pitter patter when I discovered one of my absolute favorite kitchen organizing tools…Fridge and Freezer Binz!  Compartmentalizing the food in your fridge and freezer is an easy, yet super effective way to facilitate finding the items that you need quickly.

TJ Maxx Organizing Products 10

Here’s another nifty kitchen clutter control tool…an over-the-cabinet basket.  I love to free up drawer space in the kitchen by using the backs of cabinet doors for storage.  This tool makes it easy.  (I actually purchased one of these to use in my bathroom to store my hair dryer and flat iron).

TJ Maxx Organizing Products 12

Last, but not least, are these colorful sets of drawer organizers, which can be used to organize virtually any drawer in your home.  As the packaging states, they “make organizing as easy as 1, 2, 3.”!

TJ Maxx Organizing Products 13So go ahead and explore your local T.J. Maxx (or Marshalls for that matter, since they are basically the same store) and report back to share the treasures you discover on your hunt for inexpensive organizing products.

Want to learn more about Natalie Gallagher or Refined Rooms?  Visit RefinedRoomsLLC.com

Featured post

Go Under the Bed to Uncover Hidden Storage Potential


As a professional organizer, I spend a lot of time with my clients exploring measures they can take to maximize the storage space within their homes.  In previous posts, I’ve described the importance of “going vertical” and using the backs of your doors to expand your storage possibilities.  Today, we’ll explore an often untapped area in your home that can serve as extra storage space…under your bed.

Let me begin with the disclaimer that feng shui experts are not keen on the idea of using the space under your bed to for storage.  I’ll leave it to you to determine whether the less-than-optimal fung shui is outweighed by the extra square footage that you will gain by utilizing the space under your bed’s footprint.

Bed Risers

The most common way to render “under the bed” a useful space is to raise your bed off the floor a bit.  I’ve seen people use wood blocks or even cinder blocks to elevate their bed.  Did you know that there’s actually a product that is made specifically for this purpose?

Bed risersSource

You can purchase a set of bed risers at almost any of the major retail stores.  They come in varying heights and are typically made of plastic or wood.  The one featured above comes with a bonus electrical outlet.  Fancy!

Captain’s Bed

Looking for a great storage solution for a small bedroom?  Perhaps a captain’s bed is the answer.  These beds boast built-in drawers beneath the frame that make use of the space between the floor and the bed frame.  The captain’s bed can eliminate the need for a dresser or chest of drawers in your bedroom, which will make the room feel more spacious.

bed solutions for small spaces 2 Source

There are so many cute captain’s beds for kid’s spaces available today.  Many of them offer open cubby spaces in addition to closed (drawer) storage, like this one:

bed solutins for small spaces 3Source

 Murphy Bed

Need a place for the occasional house guest to sleep, but don’t have the luxury of a designated guest room in your home?  The murphy bed is the ideal solution for you.  What is it you ask?  A murphy bed is a bed that is hinged at one end to store vertically against the wall, or inside of a closet or cabinet.
Pull it out when you need it on those few occasions during the year:

bed solutions for small spaces 5

Source

…and push it back up and out of the way when the bed is not in use. Voila – instant square footage!  This particular brand gets an A+ for clever design.  Did you notice that the bed support doubles as a desk/work area?

bed solutions for small spaces 4 Source

Storage Bed

It looks like a typical upholstered bed, right?

bed solutions for small spaces 7

Source

Wait for it…

bed solutions for small spaces 6Source

Ta da!  How’s that for the unexpected?  a storage bed such as this one can yield up to about 50 extra square feet of storage space.  Not too shabby, eh?

Moral of the story – if you are pressed for space, don’t overlook the wealth of opportunity that lies underneath your beds.  Got another way that you utilize your under-the-bed space?  I’d love to hear about it.  Be sure to leave a comment below.

Want to learn more about Natalie Gallagher and Refined Rooms?
Visit RefinedRoomsLLC.com

Featured post

Major Takeaways from the 2014 Association of Personal Photo Organizers Conference

If you’ve ever attended a professional conference, you can relate to that energized, yet frenetic post-conference feeling you have upon returning home.  I have a “post-conference routine” that I engage in to ensure that I capitalize on my conference experience as much as possible.  This routine includes creating a list of core takeaway messages, as well as a list of action steps for implementing all of the new business ideas that conference attendance invariably conjures up.

APPO conference

Earlier this week, I returned from the Association of Personal Photo Organizers (APPO) conference in Dallas and finally had a chance to create my list of core takeaway messages from the conference.  In today’s blog post, I’ll share the list with you.

 Takeaway #1:  

There is a monumental need for photo organizing services

The photo organizing industry is a field that is currently in its infancy.  The field has emerged as a consequence of the huge volume of photos that people have amassed since the advent of the digital camera, as well as the ever-changing sea of technology that has significantly impacted the way in which we capture our memories.  People are often too busy and/or too overwhelmed to regularly manage and safeguard their photo collections on their own.

The need for help is significant.

appo conference too many digital photos

Takeaway #2:  

Our photos are sacred to us

It’s certainly not an earth-shattering revelation to say that our photos are very important to us.  During the conference though, I came away with an enhanced appreciation for just how important a role photos play in our lives.  This message really hit home as I listened to several presenters discuss their amazing stories of various photo rescue efforts following natural disasters that have occurred across the U.S. and Canada.

Because photos are so sacred, it is vital that we all take the necessary steps to ensure that our precious memories are safe in the event of an unthinkable disaster.
appo conference natural disaster photo recovery

Takeaway #3:  

Our photos are everywhere…and that’s a problem

One of the consistent themes throughout the conference was the need to address the universal challenge of having our digital photos scattered across many different devices.  The typical person has segments of their photo collection stored on their phones, tablets, laptops, cameras, and memory cards/flash drives.

The first step for putting a photo management system in place is to establish a digital “hub”–that is, a centralized place where all images will ultimately be stored, once collected from the original image source.

This image created by my APPO colleagues at PSG Photo Solutions provides a useful illustration of the digital hub concept.


appo conference central hub for photos

 Takeaway #4:  

Our photos are not properly backed up…and that’s a problem

Another key component of a good photo management system is setting up an appropriate back up system for your photos.  Several conference presenters shared alarming statistics regarding the percentage of people who don’t back up their photos on a regular basis, or have NO back up system in place whatsoever.

In addition, many people back up their photos to CD/DVD and are under the impression that their photos are safe for the long-term, when in fact, the average shelf life of the typical CD/DVD is 2-5 years.

Takeaway #5:  

The way that we share our photos has changed over time

We print less photos, but share more than we used to.

While rates of photo printing have decreased, the variety of ways in which people “interact” with their photos has increased.  People are choosing to be more creative with their photos, using  photo books and photo products for displaying and sharing.

Of course, the advent of the smart phone, tablet, and picture sharing sites have also contributed to the demise of the print photo.

Friends Using Digital Tablet in Park

Takeaway #6:  

We take a lot of bad photos…but that can be easily remedied

During the conference, I had the opportunity to hear well-known photographer Nick Kelsh discuss the need for ruthless purging of bad photos (and according to him, bad photos are an epidemic).  So many of us tend to keep every single shot we’ve ever taken.  Don’t be afraid to throw away the blurry ones…and the photos of your foot that you took accidentally.

Nick also offered these simple, yet powerful tips to reduce the number of bad photos you will eventually need to cull from your collection:

appo conference Nick Kelsh photography advice


Featured post

Beyond the Gallery Wall: Creative Photo Display Ideas

As I prepare to leave today for the Association of Personal Photos Organizer’s (APPO) conference, I thought it would be appropriate to address photos in today’s blog post. Specifically, I thought it would be fun to share some uber-creative photo display ideas I’ve come across that ain’t your typical gallery wall. Not that there’s anything wrong with a gallery wall.  It’s a classic and timeless way to decorate with photos:

Source

If you want to create a traditional gallery wall, there are a number of great DIY tutorials out there to assist you with the planning and placement process. Today, however, we are going to explore some photo display options that are a bit more “outside the box”.

1. Mixed Photos and Accessories Wall

This eye-catching wall display includes photos interspersed with art and wall accessories. You don’t have to be a photo purist…mixing things up creates serious visual interest. Just be sure to include some sort of unifying element that ties the entire collection together, such as a consistent color, texture or shape.

Accessory and Photo Wall

Source

2. Wire and Clips Display

For the high school or college student searching for a cool way to display their volume of Instagram photos (for those students who actually print their photos), this method offers the perfect blend of functionality and kitsch. Simply string a piece of wire, twine, or thin rope across the expanse of your wall and use clips to secure the photos to the wire. You can purchase ready-made kits designed specifically for this purpose. This method of display enables easy change-out of photos; it works great for more casual rooms in the home, such as playrooms, craft rooms, or even some family rooms.

Wire and Clip Photo Display

Source

3. Plank-Mounted Frames

Talk about a statement-maker! This set of gorgeous handmade photo frames mounted on pretty painted planks is available at the Project Cottage Etsy store. I envision these being displayed prominently on a fireplace mantle. Can you see it?

Plank-mounted frames

Source

4. Photo Collage Wallpaper

Have you heard of We Montage yet? It’s a company whose motto is to “live beyond the frame.” You can upload your digital images to their website to create large-scale photo collages in the form of a removable “wallpaper” that easily adhere to your wall. This method of photo display is a useful option for spaces in which hanging photo frames is not practical.

We Montage Photo Collage Wallpaper

Source

5. Wrap-Around-The Corner Photo Display

If your goal is to introduce “The Unexpected” into a room, this product is sure to please. This picture frame is designed to wrap around 90-degree corners. What a truly innovative way to display those photos, don’t you think?

Wrap Around the Corner Frame

Source

6. Heart-Shaped Collage

Since Valentine’s Day falls at the end of this week, I couldn’t resist wrapping up with this simple, yet design-savvy display option – affixing a collage of photos to the wall in the shape of a heart. Here’s a quick tutorial on how to accomplish this with ease.

Heart SHaped Photo Collage

Source

Displaying cherished photos is a powerful way to make your house feel like home. I hope that you come away from this post inspired to embark on your own unique photo display project. If you do, please return to the blog and tell me about it…and include a photo of your completed project!

For more creative ideas for displaying photos in your home, take a look at the Refined Rooms Phabulous Photo Display Board on Pinterest.


 Want to learn more about Natalie Gallagher and Refined Rooms?  Visit www.RefinedRoomsLLC.com


Featured post

Organizing the Organizer’s Home: Closet Makeover Reveal


Ever heard the saying about the cobbler’s children who have no shoes? Sometimes this adage holds true for professional organizers as well!

I have a confession to make…there are areas in my own home that are in desperate need of an organizing makeover (audible gasp).
 
One of my resolutions for 2014 is to set aside time in my schedule to revamp these spaces. As I alluded to in my last blog post, I took advantage of the Container Store’s annual Elfa shelving sale in January and completed the first project – the guest room closet makeover.
 

Closet Makeover BEFORE 1
 
This closet serves as a storage area for gift wrapping supplies, photos, scrapbooks, fabric, sewing machine/supplies, and empty shopping bags. These items are seldom accessed, but when I do need to retrieve something, I usually end up uttering a few choice curse words as I sift through the closet contents. This is particularly true when it comes time to retrieve a gift bag:
 
closet makeover gift bags
 
During the “makeover” process, I followed the same steps that I do with every client I work with, beginning with assessing the space. As you can see in the top photo, it’s quite clear that storing items on the floor is not working. My new storage system needed to take full advantage of the vertical space in the closet. I determined that the best solution for my specific storage needs is a set of freestanding deep drawers for each side of the closet. In addition, I decided to change out the stationary shelving and replace it with a track shelving system. In addition to giving me the benefit of adjustable shelf height, the track system allowed for the addition of a third shelf to be installed at the top of the closet to store smaller, lighter items.
 
A quick aside…I must rave about the Container Store’s customer service! I called the store to place the order for my closet system the day before my road trip to the Columbus store. When I arrived, they had all the components of my system wrapped up and ready to load in my car. I also love the cute bags that they use to store the small components and hardware:
 
Container Store Collage
 
Once I returned from the store, the transformation began. After removing everything from the closet, the next step in the process was to sort items into categories and purge unwanted items. It was then time to remove the existing shelving system (no small feat), patch the holes, paint, and begin to install the track system:
 
closet makeover STANDARDS
 
Do you see that horizontal piece at the top of the closet? It’s called the top track, and one of the awesome features of the Elfa easy hang system is that this is the only piece that attaches to your wall. Fewer holes in your wall is always a good thing.
 
Ready for the reveal?
 
closet makover AFTER 1
 
What was once my least favorite closet is currently my most favorite. I go in there several times a day and open the drawers to admire the perfectly organized contents!
 
It would have been ideal to remove the closet doors for the photo shoot, but Dear Hubby said it would be too much effort. I’ve done my best to capture the changes in the photos below:
 
closet makover elfa drawers
 
Here’s a close-up of the amazing drawer system. Elfa drawers can either be attached to the track or set up as part of a freestanding system. I chose the freestanding systems, since they allowed for the wider and deeper drawer size that my project required. Let’s take a look inside those drawers, shall we?
 
closet makeover drawer 2
 
This is one of the two shallow top drawers, which contain small gift bags, wrapping supplies and tissue paper.
 
Now the gift bags are easily retrievable. I even have separate drawers for everyday gift bags and holiday-themed gift bags! I seem to have a gift bag and gift wrap fetish. So I’ve implemented one of the rules that I teach my clients when it comes to controlling clutter…let the container set the limit for how much you can keep. I can only keep as many gift bags as this drawer can accommodate:
 
closet makover drawer 3
 
Of course, the last step in organizing the drawers was to label each one so that everyone else is clear on what items live in each drawer:
 
closet makeover labels
 
Let’s shift our attention to the closet shelves. Empty boxes for gifts and the seldom-used sewing kit are the perfect items to be stored up high:
 
closet makeover upper shelf
 
The lower shelves are used to store my scrapbooks, photos, and unfinished projects. I love the addition of the storage baskets for corralling those scrapbooks!
 
closet makover Elfa Shelving
 
More basket eye-candy…
 
closet makover basket
 
The left side houses my print photo collection (notice the archival quality storage boxes). There’s another basket that contains gift wrapping ribbon.
 
closet makeover interior shot

So there you have it! I’ll leave you with a few Before/After shots. Onto the next home project…

Closet Makeover Before After 2


Closet Makover Before After 1


Interested in learning more about Natalie Gallagher and Refined Rooms?
Visit www.RefinedRoomsLLC.com.


Featured post

Elfa Storage Systems: The Perfect Foundation for Your Organized Space

 
For those of you who are lucky enough to live within driving distance of a Container Store, you may be familiar with their Elfa storage systems. For the rest of you, I want to introduce you to this amazing system, which serves as the perfect foundation for organizing a variety of spaces within your home.
 
Elfa is The Container Store’s brand of fully customizable modular shelving and drawer systems. It can be used in any room of your home, including a closet, office, garage or pantry. Elfa shelving/drawer systems provide the vital “skeleton” of vertical storage space that serves as the foundation for an organized room, at a fraction of the cost of custom built-in shelving.
 
The most common place where you will see Elfa storage systems in action is bedrooms closets. Of course, there are many products on the market today designed to improve closet storage space. The advantages of the Elfa system over most other closet storage systems are two-fold: a) the installation involves much less damage to your walls compared to conventional stationary shelving (see The Borrowed Abode’s blog post that nicely illustrates this comparison), and b) Elfa’s track and rail system enables the end user to fully customize their closet to meet their unique storage needs.
 
Elfa Closet
 
There are other systems available in the big box home improvement stores that are similar to Elfa in terms of their basic design. In my hands-on research, however, I have found that Elfa systems are far superior in terms of their strength, durability, and ease of use. For example, I have consistently found that the add-on drawer systems for the other brands are fairly flimsy, and difficult to open and close compared to the Elfa drawers. Both Good Housekeeping and consumer review sites  have arrived at the same conclusion.
 
Elfa storage systems come in a variety of styles and finishes, including the classic white framework with white ventilated shelving, as featured in this pantry system:


WhiteElfaVentilatedPantry_x


If you aspire to a more upscale look, this Elfa home office system might be just the answer. It features a platinum track/bracket system and one of the many solid “décor shelf” options:
 
Elfa Home Office
 
In addition to the original wall-mounted version, Elfa storage systems also come in a freestanding version. Freestanding shelves come in handy when you are dealing with walls that are not easy to drill into, such as the example above. They are also a great option for renters who want to avoid wall repairs later on when it’s time to move out.


Here’s another example of a freestanding Elfa system for the mudroom:


Elfa freestanding mudroom


Using Elfa storage, you can create a dynamite kid’s bedroom study area:

Kids Room 

 
One of my favorite spaces for introducing some Elfa magic is in the craft room:


Elfa Craft Space


In case you were wondering, yes, you can even use Elfa to organize the contents of your garage:


Elfa Garage
 
Another critical advantage of choosing an Elfa storage system for your home is the benefit of the Container Store’s amazing customer service. They provide free design assistance in the form of an in-store consultation (for those of you lucky enough to have a local store) or via their on-line design center. If you prefer to speak to a human, you can access their design experts at no cost via phone or live chat as well.
 
Did I mention they also offer an installation service? If you are not the DIY type, this definitely comes in handy!
 
Now is a great time to invest in Elfa storage systems for your home, as the Container Store is currently running their semi-annual Elfa sale, in which all system components and installation services are 30% off. Elfa shelving is a component of a few client redesign projects, so we will be taking advantage of the sale. Over the coming months, my home will serve as an Elfa system laboratory as I work to improve upon the functionality of several neglected spaces. You’ll be hearing more about that in upcoming blog posts. How about you? What part of your home can use a little Elfa “magic”?


Elfa Laundry Room


Interested in learning more about Natalie Gallagher or Refined Rooms LLC?  Visit www.RefinedRoomsLLC.com


Featured post

The Professional Organizer’s “Top 10” List of Helpful Organizing Tools

go month white with napo landscape
 
January is national Get Organized (GO) Month, and members of the National Association of Professional Organizers (including me) have been celebrating all month long across the country by providing tips, tricks, advice, and information on all things ORGANIZATION!
 
Since I know that many of you will be hard at work this month attempting to bring order to the chaos that lurks in your closets, pantries, cupboards, file cabinets, and drawers, I thought it would be a good time to talk about products that you may find helpful as you tackle these areas.
 
Today, I’m sharing a list of “Top 10” picks from my arsenal of most frequently used organizing tools and products.
 

1.  Adjustable Shelving

 
Adjustable shelving systems aren’t just for closets!  Use them in the laundry room, your home office, kid’s rooms and craft rooms.  These systems enable you to maximize vertical space and create a fully customizable storage solution that can change over time as your needs change.  In this illustration, we made full use of this office nook by installing adjustable shelving to house office supplies.
 
Adjustable Shelving
 

2.  Hooks

 
I use hooks anywhere and everywhere throughout the home.  Use them in the mudroom to hang coats and keys, or in bedrooms to hang belts and scarves, or jewelry.  I especially love to use Command Hooks on the inside of doors (including cabinet doors) to add storage space when needed.
 

command hooks


3.  Glide-Out Shelving

 
If I could install these in every bathroom and kitchen cabinet across America, I would. Glide out shelving makes every inch of your lower cabinets and deep pantry shelves accessible. Check out my client’s pantry here; can you imagine what is what like for her to access items in the back of the pantry before we installed these? They are a terrific investment and I recommend these regularly when organizing kitchens and bathrooms.
 

Top 10 Glide Outs


4.  Over the Door Shoe Organizers

 
Use these for everything EXCEPT shoe storage! They are great for storing lots of small items. Use for craft supplies, toiletries, hair accessories, etc.  I recommend the clear organizers so that your small items are easily visible.
 

Top 10 Shoe Organizer
 
5.  Drawer Dividers

 
Drawer dividers are a must for organizing small things within a larger space. I routinely use them in dresser, kitchen, and desk drawers.
 
Top 10 Drawer Dividers


6.  Desk Top File Box

 
The desk top file box is one of the secrets to banishing those paper piles in your home.  I instruct my clients to place it in a central location in their home and use it to corral their “active” papers.
 

Top 10 Desktop File Folder


7.  Stackable Bins

 
Bins are the quintessential organizing product!   I use these in all shapes and sizes and for countless purposes.  Stackable bins are even more awesome because they enable you to maximize vertical space (do you sense a theme here?)
 
Top 10 Stackable Bins
 

8.  Door Rack Systems

 
Adjustable door rack systems magically increase your storage space by utilizing that oft-forgotten area on the back of your doors.  Not only have I installed these in client’s homes on the backs of doors, I’ve also used them on wall space in the basement stairway and in garages.  My favorite is the Container Store’s Elfa Door and Rack System.
 

 Elfa Door Rack


9.  Slim Profile Hangers

 
 Short on closet space? These non-slip felt hangers keep clothes in place with an ultra-slim profile that uses less space than conventional hangers. I love the ones that come with hooks that enable you to cascade hangers for even greater clothing storage capacity.
 
Top 10  Slim Hangers
 

10.  Magazine Files

 
Another great tool for banishing those pesky paper files!  Use these to store magazines, catalogs, periodicals, manuals, etc.  Face the spine outward in order to eliminate visual clutter.
 
Top 10 magazine files
 

BONUS PICK!

 
No list of essential organizing products would be complete without the Organizer’s Best Friend…the Label Maker!  Labels make returning items to their homes (an essential step in maintaining an organized space) a no brainer.
 
label maker
 
So there you have it!  Can you think of a way to incorporate these organizing power houses into your next home organizing project?  Leave a comment and tell us all about it!
 

Interested in learning more about Natalie Gallagher or Refined Rooms LLC?  Visit www.RefinedRoomsLLC.com


Featured post

Refined Product Best Pick: Grandin Road’s Andros Sliding Trunk

 
As a new component of the blog, I will be featuring Refined Product “Best Picks”– products, furniture, accessories, and organizing tools that perfectly fuse form and function.
 

Today’s Best Pick is the Andros Sliding Trunk, brought to you by Grandin Road.  This fabulous piece can function equally well as a bench (at the foot of your bed, in an entryway) or as an ottoman.  Of course, any piece of furniture that is multifunctional and provides storage is a winner in my book!
 

Source


The Andros Sliding Trunk also boasts a clever design. Have you ever had to access the contents of your ottoman, and been annoyed that you have to remove everything on top prior to opening it? Not with this piece. Simply slide the lid tops to each side without moving a thing. Genius! It even comes with a removable wood tray that sits inside the interior track.
 
If you are looking to introduce a coastal vibe into your space and are in need of additional storage, this piece is a must-have!
 

Want to learn more about Natalie Gallagher or Refined Rooms LLC?  Visit www.RefinedRoomsLLC.com.


Featured post

Organizing your “Undecorate” Process

 
Do you keep the holidays alive throughout the month of January, or have you already begun the holiday “un-decorate” process in your home? Whichever camp you fall in, it’s helpful to think about ways to make next year’s holiday decorating process a little easier on yourself. If you are the type that really dreads the process of holiday decorating, it’s particularly important that you store your holiday items in an organized manner in order to minimize the pain of decking the halls come next December.
 

I thought I’d share a few helpful tips to keep in mind as you begin the process of storing your holiday items for next year…
 

CREATE A DECORATING “CHEAT SHEET”

 
Before disassembling any of your holiday vignettes, be sure to take photos of them. These photos will enable you to easily replicate the vignette on your mantel, bookshelves, and table tops for next year if you don’t have the time or inclination to come up with new ways to display your holiday accessories.
 
Holiday Decorating Cheat Sheet1


I have a file folder named “Holiday Decorating” on my computer that I routinely refer to each November as I begin the process of decorating for the holidays. I typically like to mix things up from year to year. Occasionally, I’ll find my creative juices lacking and I’m thankful to have the photos to use as a “cheat sheet” for re-creating a tried-and-true vignette from a previous year.
 
Holiday Decorating Cheat Sheet 2


IMPLEMENT A STORAGE GAME PLAN


1. IDENTIFY & LABEL HOLIDAY BINS

 
Determine how you will identify your holiday bins among the vast collection of storage bins in your attic/basement. Will they all be a particular color? Right now, the major retailers have most of their bins on sale in a variety of colors for storing holiday décor.
 
Holiday Storage Bins


You will also need to determine how you will keep track of the contents of each bin. You basically have 2 choices: 1) label the contents on the bin itself (using a large label or the ever-popular duct tape/sharpie method), or 2) number the bins and create an inventory of the contents for each numbered bin. You can keep the inventory in your holiday planner/notebook or in a designated folder on your computer.
 

2. SELECT A STRATEGY FOR GROUPING DECOR

 
The way you group your items in storage bins should be determined by how you decorate your home for the holidays. Do you like to decorate with the same items and in the same location every year? If so, group your décor items by the location in which they are displayed (e.g., a “dining room” bin and a “fireplace” bin). If you like to mix it up each year, then it makes more sense to group like items (e.g., a “garland” bin and a “wreaths” bin).
 
Bonus tip: Create a “#1 Bin”, which contains the items that you need early on in the season. This can include items such as your advent calendar, the Elf on the Shelf, and holiday cookie cutters.
 

3. CHOOSE CONTAINERS WISELY

 
My final tip is to put some thought into the containers you choose for storing your holiday items. You will want to avoid stuffing your décor into ginormous 150 gallon bins (particularly if you are storing them in the attic!). If your containers are manageable, it will make the task of lugging them up from the basement each year less aversive.
 
Do you have a tip to share for making next year’s decorating process easier? I’d love to hear it.  Leave a comment below!
 

For more information about Natalie Gallagher and Refined Rooms, visit www.RefinedRoomsLLC.com.


Featured post

Gift Wrap Solutions


Source

 
Here we are, 3 days before Christmas, and most of us are surrounded by stacks of gifts that are in need of wrapping. Perhaps this is the only time of year you find yourself knee-deep in wrapping paper rolls, gift tags, and bows. For many of us, we find ourselves frequently accessing the gift wrap supplies throughout the year for wrapping birthday gifts, hostess gifts, Mother’s and Father’s Day gifts and graduation gifts.
 
Whether you use gift wrap supplies regularly or once a year, having an organized storage solution in place for these supplies will enable you to complete the task of gift wrapping as painlessly as possible.  Here are some common types of solutions to consider if you on a mission to organize your gift wrap supplies this year…


Rolling Carts


Source

 
Storing your gift wrap and accessories in a rolling cart enables you to roll it out to the location you want to use it (in front of the t.v. is a great spot for completing a marathon wrapping session), and then easily store it back in a corner of your room or in your closet when not in use.


Source


Vertical Storage Solutions

 
In previous blog posts, I’ve emphasized the importance utilizing vertical space  in your home to increase storage space, particularly the back of your doors.  Consider installing a door storage solution such as the one pictured below in a guest room, craft room, or even in your home office.
 

Source


This hanging gift wrap storage station is another storage option that takes advantage of vertical space…within your closet. It offers the benefit of portability as well.


Source


Under-the-Bed Storage Solutions

 
Another common place to stow away gift wrap materials is under the bed.  The shape of gift wrap rolls (small and long) make them great candidates for under-the-bed storage.  If this particular storage area of your home has been under-utilized, you may want to use an under-the-bed storage tote for corralling your rolls of gift wrap, as well as ribbon and gift tags.
 

Source

 
Have another storage solution that you love?  Please share by leaving a comment below.  Happy Wrapping!
 

To learn more about Natalie Gallagher and Refined Rooms LLC visit www.RefinedRoomsLLC.com.


Featured post

Overcoming Holiday Overwhelm – Part 2


wreath2

 
In Part 1 of this series, I discussed the importance of setting realistic expectations and adopting a Zen attitude regarding the holiday season, as well as the importance of eliminating as many holiday obligations as possible. In Part 2, I outline 5 valuable tips for enhancing the joy and reducing the stress of the holiday season.
 

1. BEGIN PLANNING EARLY

 
Would it surprise you to hear that most of the holiday planning books and resources suggest that you begin the planning process in late September/early October? When you begin your planning well in advance of the official holiday season, it will enable you to spread out your massive To Do list into bite-size chunks. In addition, you will be able to identify tasks that can be completed well in advance, which frees up more time for relaxation and enjoyment as the holiday week draws near.
 

2. CREATE A MASTER HOLIDAY TO DO LIST AND CALENDAR

 
Begin the planning process by creating a Master Holiday To Do list, that outlines each task that you need to complete for the holidays and order them by the month in which the task needs to be completed. Be sure to consider the following broad categories when creating your To Do List:

Holiday Home Preparation – cleaning, decluttering, decorating;

Holiday Hosting – food shopping, menu planning, sending out invitations, cooking/baking;

Holiday Shopping/Gift Giving – budget, gift recipient list, gift ideas, shopping, gift wrapping, homemade gifts;

Holiday Traditions – family portrait, holiday cards, caroling, tree farm, religious events.

 
Once you’ve completed your To Do list, the next steps in your planning process are to 1) estimate how long each task will take to complete, 2) determine a start date and a deadline for each task, and 3) enter these dates into your holiday calendar.
 

3. CREATE A HOLIDAY PLANNING NOTEBOOK

 
christmas-planner
 
A holiday planning notebook is the most essential tool for maintaining your sanity this time of year. The planner should serve as the home for all information, resources, and planning tools you need to accomplish the tasks on your Master Holiday To Do List. In addition to your To Do List and calendar, the holiday planner should contain the following:  budget, gift list, party menus, holiday card recipient list, coupons, and receipts.
The notebook can be created using a variety of formats; I suggest using a 3-ring binder with page protector inserts to contain your papers. The good news is that there are several fabulous online resources for creating a holiday planning notebook so you don’t need to start from scratch! My favorite resources for free holiday planning printables are the Organized Christmas and Christmas Your Way websites. Both of these websites offer a holiday calendar and a master Holiday To Do list, as well as many other blank checklists, inventory sheets, and shopping lists. No need to reinvent the wheel, right?
 

4. USE HOLIDAY PLANNING APPS

 
holiday organizing app


If you prefer electronic over paper organizing solutions, there are a ton of holiday planning apps out there for you to explore. Some apps assist with managing your gift purchases/budget, while others assist with holiday meal/menu planning.
 

5. DELEGATE

 
A primary cause of holiday overwhelm is the belief that we have to complete all of the items on our Master Holiday To Do list ourselves. This year, I invite you to challenge that belief and explore ways to delegate the responsibility for some tasks to others. Have your kids stuff the holiday cards into the envelopes. Divvy up the gift shopping list between you and your spouse. If you are hosting a holiday dinner party, make it a “potluck” so that you are preparing only the main course instead of the entire dinner.
 
Alternatively, consider hiring professionals to outsource certain tasks (a handyman to install exterior lights, a professional cleaning service, a printing company to address and send out holiday cards). The small investment will pay you back tenfold in the form of reduced stress!
 
Do you have a favorite holiday planning tool, resource, or method? Leave a comment below. We’d love to hear about it!


Featured post

Overcoming Holiday Overwhelm – Part 1

 
christmas_calendar
 
So here we are…December 1st. By now, many of us have been in Holiday Mode for several weeks. For a lot of people, the Magic of the Season has slowly devolved into a never-ending list of extra tasks and obligations that leave us feeling depleted and longing for January 2nd! We play the “How Many Holiday Activities Can I Commit Myself to Before Imploding?” game. We aspire to the Martha Stewart-esque décor and party spreads, as well as the Norman Rockwell-esque family get-togethers. Are you ready to stop the madness? “Yes, but how?” you ask. Here’s how…
 

Adjust your Expectations and Attitude

 
I know that it’s easier said than done, but we need to free ourselves from the unrealistic expectations of what we think we have to do this time of year and from our mind’s picture of what the holiday should “look like”. Be realistic about what you can accomplish with the limited time and energy that you have! Adopt a zen attitude this season…it won’t be perfect, you won’t be able to do everything, and that’s o.k.
 

Zen-Christmas2


Reduce Holiday Obligations

 
Begin your holiday season by making a list all of the activities that conjure up that “magical feeling” and bring you true joy. Next, make a list of all of the holiday activities that you typically do. The activities that are on list #2 and NOT list #1 are what I call Holiday Obligations. How many of these obligations might you be able to eliminate this holiday season? Focus on the ones that really deplete your energy.
 
When you realize that there really is no mandatory list of activities that we MUST do, you begin to feel very liberated! Is putting up exterior lights the bane of your existence? Nix it off the list. Despise attending the neighborhood holiday party? Say “no thank you” this year. Overwhelmed by the thought of getting Christmas cards out? Send an e-card or forego them altogether.
 
The holiday obligation I chose to remove from my list was having a live 12-foot high Christmas tree in our home. I love the experience of going to the tree farm and enjoy the fresh pine smell in my home. BUT… I have come to dread the task of hauling it in and out of the house, securing it to the wall, making sure it’s straight, putting on 1000+lights, and blinging it out to perfection (and making sure it’s watered each day).
 
Simplify Christmas1


Not this year!!! After surveying my family members and learning that all but one of us doesn’t mind the idea of a 7 foot artificial tree and won’t be devastated about missing our annual trip to the tree farm, we made the executive decision to nix the live tree (poor Hubby went kicking and screaming, but he’ll get over it).
 
I took it a step further and handed over the responsibility of decorating it to my 2 kiddos (adopting my Zen attitude). Does it look as fabulous as when I single-handedly spent an entire day painstakingly adorning it ? Not quite. Am I o.k. with that? Heck yea! Time is a valuable commodity in my life these days and I saved so much time by letting the kids take charge. Of course, they enjoyed the freedom of choosing the ornaments and placing them wherever they wanted without Mom rearranging them.
 
Simplify Christmas2
 
In Part 2, we will continue to explore concrete steps you can take to reduce stress and enhance your enjoyment of the holiday season.
 
Interested in learning more about how to Overcome Holiday Overwhelm? Join me on Wednesday, 12/4 from 6:30-7:30 p.m. at the Green branch of the Summit County Library at 4046 Massillon Rd, Uniontown, OH 44685 when I will speaking on this topic.
 

Interested in learning more about Natalie Gallagher or Refined Rooms?
Visit www.RefinedRoomsLLC.com


Featured post

Managing Your Print Photo Collection: Step 2 – Safeguard

 
In Part I of Managing Your Print Photo Collection, we gathered our photos together with our photo organizing “tool box” on hand, and decided which photos were “keepers”. We then determined the sorting themes/categories for our collection, after first performing a rough chronological sort. Once we’ve completed the sorting and purging process, we need to take the necessary steps to safeguard our photos for the long-term.


SAFEGUARDING YOUR PRINT PHOTOS


  • Use only archival-quality photo boxes (to store B Photos) and albums (to display A Photos). Archival quality products are acid and lignin-free, so they will not accelerate the natural deterioration process inherent in print photos. Some great sources for these products include: Archival Methods and University Products.


  • Scan your print photo collection to create a digital version of your photos. If you have the time and the right equipment, you can complete this job yourself. Alternatively, you can outsource this task and have a professional photo organizer complete it for you. You’ll need to decide if it’s worth the investment to digitize your entire collection, or perhaps just your “A Photos”.
  • Once your collection is digitized, put a redundant back-up system in place so that your digitized print photo collection AND your collection of digital images are protected. Your back-up system should include an external hard drive back-up, as well as storage “in the cloud”. There are a large number of cloud-based options, including those that offer storage only (e.g. Drop Box, Carbonite), as well as websites that include photo management features as well as photo storage (e.g., Flickr, Photobucket). You may also want to consider using Picture Keeper as part of your back-up system. When you plug this flash drive device into your computer, it automatically finds and copies all image files located throughout your computer’s hard drive.

To make it even easier for you to put a back-up system in place for your photos, Picture Keeper is offering a deep discount on their products during the month of November:


Save 28% on Entire Purchase with Free Shipping!


Once you’ve organized and safeguarded your print photo collection, it becomes much easier to integrate these precious memories back into your life. By creating digital photo books, online albums and traditional scrapbooks for yourself and others, you and your family members will be able to enjoy reliving these special moments for years to come.


Need assistance putting a back-up system in place for your photo collection? Contact Natalie Gallagher at Refined Rooms LLC to learn more about photo organizing services.  We are a proud member of the Association of Personal Photo Organizers.
 

Featured post

Managing Your Print Photo Collection: Step 1 – Organize

PAPER REFINEMENT SERIES

Did you know that Paper Management is the number one reason that people hire a professional organizer?  Despite our society’s best efforts to “go paperless”, excess paper clutter is a universal challenge in the homes in which I work.  This post is the second in a series of blog posts that will focus on paper management.


If you ask people what possessions they are most likely to salvage from their home if it was on fire, they are likely to say their photo collection.  Ironically, managing our photo collections is typically a very low priority on our “To Do” list.  Dealing with those shoeboxes full of print photos is one of those tasks that most people plan to tackle “someday”.   A disaster is not the only way photos can be destroyed.  If your photos are improperly stored, you run the risk of losing your precious memories to damage caused by acidic papers, inks, and glues, as well as mold and mildew.  By setting aside time to properly organize and safeguard your old print photos, you will be better able to enjoy them and share them with others for many generations to come.  In today’s post, I’ll provide some basic tips for tackling the organizing process.

ORGANIZING YOUR PRINT PHOTOS

  • If your photos are scattered throughout your home, the first step is to gather all of your photos (including loose photos and photo albums) in one central location.  This location should contain a large, flat work surface.  A dining room table works great for this purpose.

  • Before you begin sorting photos, make sure you have the necessary tools available.  Your photo organizing “tool box” should include:
    • Cotton gloves (to protect photos from skin oils)
    • Post-It notes/pen (for labeling your categories)
    • Photo safe pencils (for writing notes on the back of photos)
    • Dental floss/hair dryer (for removing stubborn photos from any “peel and stick albums”).
  • Complete an initial “rough sort” by sorting your photos by decade, using shoe boxes to contain each decade.
  • Next, go through each “decade box” and fine-tune your sort.   I recommend sorting photos by theme.  Some common themes include:  Holidays, Travel/Vacations, Sporting Events, School Days, Celebrations, etc.  Sorting categories are based on both your personal preference and the content of your particular collection.


  • As you complete the fine-tuned sort, implement the “ABC’S Method” (developed by the Association of Personal Photo Organizers) to determine which photos to throw away, pass along to others, archive in boxes, and set aside for display/sharing:
    • A Photos:  A stands for Album.  These are your most important and cherished photos; to be displayed in an album, frame, and/or shared online with others;
    • B Photos:  B Stands for Box.  These photos are important enough to keep, but not worthy of displaying necessarily; to be stored in archival quality boxes;
    • C Photos C Stands for Can (as in Trash Can!). These photos are not worthy of keeping; to be thrown away (blurry, unflattering) or given to others (duplicates);
    • S PhotosS Stands for Story.  These photos that might seem unimportant at first (for example, an older photo of a random house), but actually tell an important family story (the photo is the house in which your grandfather grew up).
  • Try to move as quickly as possible during the sorting process and avoid reminiscing.  There will be plenty of time for that once your project is complete!

In my next post, we’ll discuss the ways in which you can safeguard your print photo collection once the organization process is complete.

Want to learn more about Natalie Gallagher and Refined Rooms?  Visit www.RefinedRoomsLLC.com

Refined Rooms LLC is a proud member of the Association of Personal Photo Organizers!

Featured post

Manuals, Warranties, and Receipts…Oh My!


Paper Refinement Series

Did you know that Paper Management is the number one reason that people hire a professional organizer?  Despite our society’s best efforts to “go paperless”, it has certainly been my experience working as a professional organizer that excess paper clutter is a universal challenge in the homes in which I work.  As such, today I am posting the first in a series of blog posts that will focus on paper management.


Organizing Manuals, Warranties & Receipts

 
Let’s begin with organizing all of the reference paperwork for product purchases.  A common source of paper clutter that I come across in client’s homes is product manuals, warranties, and receipts for big-ticket items.  I have a favorite method for corralling all of these when on the job.  Until recently, however, I had not found the time to properly organize my own set of manuals (ever hear that saying about the cobbler’s children who have no shoes?  Sometimes this holds true for organizers too)!  As you can see from the picture below, these papers were taking up an entire drawer in my filing cabinet.  As part of my recent file cabinet overhaul, my goal was to free up the filing cabinet drawer for storing my business-related files.


As you might have guessed, the first step in the process is to gather all the paper into a central location and begin sorting into categories.  I suggest that you set aside papers for home improvement purchases (i.e., carpeting, plumbing fixtures) and large appliances.  These papers should be placed in a separate binder to be given to the new homeowner in the event that you sell your home.   That leaves you with the papers for items that would go with you in the event of a move.  Depending upon your consumer tendencies, your piles may look something like this:


During the sorting process, have the recycle bin close at hand, as you will invariably come across manuals and warranties for items you no longer own, especially if it’s been a few years since you’ve tended to these files:


My preferred method for containing all of these papers is to use 3-ring binders that use poly binder pockets with Velcro closures for each category of products.  Staples has a binder pocket that works great for this purpose, and can accommodate up to 200 pages per pocket (see below).  I use stick-on filing tabs (see below) to label the product categories.


Take a peek at what the binder looks like when fully assembled:


One binder is rarely sufficient for the average household with kids.  In fact, our papers required a total of four binders to contain all of our product manual/warranty information (the three binders for “portable” products below, as well as our binder for stuff that will stay with the house).
 
The final step is to create a cover sheet and a spine insert for the binder that summarizes the product categories contained within each binder:


Of course, for those who are really on the “paperless” bandwagon, you can often bypass this whole process by searching for the PDF versions of the product manuals online, as most manufacturers are making manuals available electronically now.

To learn more about paper organizing/management and Natalie Gallagher, visit http://www.refinedroomsllc.com


Featured post

Look to Pinterest, Houzz, and Zillow Digs for Interior Decorating Inspiration

I’m sure many of you have engaged in the “old school” method for drawing inspiration for a home decorating project…thumbing through home decor catalogs/magazines and tearing out the pages that contain appealing images…

Design Inspiration1

How many of you have file folders filled with catalog and home decor magazine pages collected over the years?  These pages may contain images of the perfect color palette for your master suite; or perhaps those files contain a great example of just the right furniture configuration for your family room, or an innovative window treatment idea.
The digital age has brought about an evolution in the way we research and gather information across all aspects of our lives, including interior design.  Today, I’ll share my top two online resources for interior design inspiration.  As a bonus, I’ll introduce a promising new resource to keep your eye on as well.

Pinterest

Pinterest came on the scene just a 3 short years ago, and is currently the 4th most popular social media website in the world.  In case you aren’t familiar with it, Pinterest is an online pin board…essentially a digital version of your file folder containing ripped out magazine pages.  A “pin” is a link to an image or video that a user has added to Pinterest.  Users can add a pin from a website or upload an image directly from their computer.  Any pin on Pinterest can be repinned, and all pins link back to their source on the web.

Pinterest boards are used to organize your pins by topic. You could pin ideas for bathroom paint color and faucets to your Bathroom Renovation board, for example. Boards can be secret or public, and you can invite other people to pin with you on any of your boards.  Here’s a screenshot containing some of my Pinterest boards:

Design Inspiration2

When you follow someone on Pinterest, their pins show up in your Pinterest home feed. You can follow all of someone’s boards or just the ones you like best.  Not only do I use Pinterest as a mechanism for capturing general design ideas, I also create project-specific boards for client projects that the client and I can use to communicate ideas, share product/sourcing  information, etc.  It has become an indispensable tool in my business.

Click here to link to my Pinterest Boards

Houzz

Houzz is the the largest collection of interior design and decorating ideas on the InternetWord of warning:   when you enter this website, you will be engulfed in a sea of home decor eye candy!  Most of the image collections that are posted on Houzz represent the work portfolios of interior designers, decorators, and home stagers.

Houzz users can gain inspiration by browsing images sorted by room type and design style.  They can post to discussion boards to ask for or offer advice concerning their own specific design dilemmas.  They can source products that are featured in room design images, and even research local design professionals in their area.

 Design Inspiration3

Similar to the Pinterest board, Houzz enables it’s users to organize their curated images into categories via “Ideabooks” that can be shared with others to facilitate collaboration on a particular project.

Click here to take a look at my Houzz Ideabooks
&nbsp

ZILLOW DIGS

You may be familiar with Zillow, a popular search website for real estate listings and real estate market information.  They’ve recently introduced Zillow Digs, an online community for home design ideas and inspiration.  Similar to Pinterest and Houzz, this site lets you browse images and save them to idea boards. You can search by style cost, and room type.   But Zillow Digs boasts one unique feature…it  provides an estimated cost for the project.  I am looking forward to exploring this site in greater detail in the coming months.

Design Inspriation4

So there you have it.  My short list of “go to” websites to get my creative juices flowing when embarking on a new redesign/home staging project.  How about you?  Do you have any great online resources to add to the mix?  If so, please share in the comments section below.

Want to learn more about Natalie Gallagher and Refined Rooms?
Visit www.RefinedRoomsLLC.com


Reflections After Hoarders Filming: Less is More

Last month, I had the opportunity to serve as a part of the professional organizer team filming an episode of Hoarders: Family Secrets. It was an experience that was both amazingly challenging, yet extremely rewarding as I witnessed a local family become free from the grip of extreme clutter over a 3-day period.

As a consequence of this work, the theme of simplicity has been very top-of-mind for me this summer. As a “tip-of-the-hat” to the simplicity theme, today’s post is a simple one.

Here’s a collection of favorite quotes that I use to inspire my clients who struggle with clutter and strive for simplicity in their lives.

Simplifying and letting go of “the stuff” enables us to focus on what really matters in our lives.

Simplicity

What matters most to us? Moments…with the people we love.

Collect Moments Not Things

The value of simplicity has been emphasized by great minds throughout the ages:

Albert Einstein

Clutter in our lives can take on various forms, as stated so eloquently by Peter Walsh. Sometimes we need to look beyond the physical clutter to forge a path to the life we want by decluttering our calendars, our To Do lists, and even our circle of friends.

Peter Walsh Quote

And I’ll leave you with these wise words...

Joshua Becker Quote

How could your life be improved by simplifying, decluttering, and letting go of stuff?

Want to learn more about Natalie Gallagher or Refined Rooms?  Visit www.RefinedRoomsLLC.com or connect via: Facebook | Pinterest | Twitter | LinkedIn