Tag Archives: photos

Major Takeaways from the 2014 Association of Personal Photo Organizers Conference

If you’ve ever attended a professional conference, you can relate to that energized, yet frenetic post-conference feeling you have upon returning home.  I have a “post-conference routine” that I engage in to ensure that I capitalize on my conference experience as much as possible.  This routine includes creating a list of core takeaway messages, as well as a list of action steps for implementing all of the new business ideas that conference attendance invariably conjures up.

APPO conference

Earlier this week, I returned from the Association of Personal Photo Organizers (APPO) conference in Dallas and finally had a chance to create my list of core takeaway messages from the conference.  In today’s blog post, I’ll share the list with you.

 Takeaway #1:  

There is a monumental need for photo organizing services

The photo organizing industry is a field that is currently in its infancy.  The field has emerged as a consequence of the huge volume of photos that people have amassed since the advent of the digital camera, as well as the ever-changing sea of technology that has significantly impacted the way in which we capture our memories.  People are often too busy and/or too overwhelmed to regularly manage and safeguard their photo collections on their own.

The need for help is significant.

appo conference too many digital photos

Takeaway #2:  

Our photos are sacred to us

It’s certainly not an earth-shattering revelation to say that our photos are very important to us.  During the conference though, I came away with an enhanced appreciation for just how important a role photos play in our lives.  This message really hit home as I listened to several presenters discuss their amazing stories of various photo rescue efforts following natural disasters that have occurred across the U.S. and Canada.

Because photos are so sacred, it is vital that we all take the necessary steps to ensure that our precious memories are safe in the event of an unthinkable disaster.
appo conference natural disaster photo recovery

Takeaway #3:  

Our photos are everywhere…and that’s a problem

One of the consistent themes throughout the conference was the need to address the universal challenge of having our digital photos scattered across many different devices.  The typical person has segments of their photo collection stored on their phones, tablets, laptops, cameras, and memory cards/flash drives.

The first step for putting a photo management system in place is to establish a digital “hub”–that is, a centralized place where all images will ultimately be stored, once collected from the original image source.

This image created by my APPO colleagues at PSG Photo Solutions provides a useful illustration of the digital hub concept.


appo conference central hub for photos

 Takeaway #4:  

Our photos are not properly backed up…and that’s a problem

Another key component of a good photo management system is setting up an appropriate back up system for your photos.  Several conference presenters shared alarming statistics regarding the percentage of people who don’t back up their photos on a regular basis, or have NO back up system in place whatsoever.

In addition, many people back up their photos to CD/DVD and are under the impression that their photos are safe for the long-term, when in fact, the average shelf life of the typical CD/DVD is 2-5 years.

Takeaway #5:  

The way that we share our photos has changed over time

We print less photos, but share more than we used to.

While rates of photo printing have decreased, the variety of ways in which people “interact” with their photos has increased.  People are choosing to be more creative with their photos, using  photo books and photo products for displaying and sharing.

Of course, the advent of the smart phone, tablet, and picture sharing sites have also contributed to the demise of the print photo.

Friends Using Digital Tablet in Park

Takeaway #6:  

We take a lot of bad photos…but that can be easily remedied

During the conference, I had the opportunity to hear well-known photographer Nick Kelsh discuss the need for ruthless purging of bad photos (and according to him, bad photos are an epidemic).  So many of us tend to keep every single shot we’ve ever taken.  Don’t be afraid to throw away the blurry ones…and the photos of your foot that you took accidentally.

Nick also offered these simple, yet powerful tips to reduce the number of bad photos you will eventually need to cull from your collection:

appo conference Nick Kelsh photography advice


Beyond the Gallery Wall: Creative Photo Display Ideas

As I prepare to leave today for the Association of Personal Photos Organizer’s (APPO) conference, I thought it would be appropriate to address photos in today’s blog post. Specifically, I thought it would be fun to share some uber-creative photo display ideas I’ve come across that ain’t your typical gallery wall. Not that there’s anything wrong with a gallery wall.  It’s a classic and timeless way to decorate with photos:

Source

If you want to create a traditional gallery wall, there are a number of great DIY tutorials out there to assist you with the planning and placement process. Today, however, we are going to explore some photo display options that are a bit more “outside the box”.

1. Mixed Photos and Accessories Wall

This eye-catching wall display includes photos interspersed with art and wall accessories. You don’t have to be a photo purist…mixing things up creates serious visual interest. Just be sure to include some sort of unifying element that ties the entire collection together, such as a consistent color, texture or shape.

Accessory and Photo Wall

Source

2. Wire and Clips Display

For the high school or college student searching for a cool way to display their volume of Instagram photos (for those students who actually print their photos), this method offers the perfect blend of functionality and kitsch. Simply string a piece of wire, twine, or thin rope across the expanse of your wall and use clips to secure the photos to the wire. You can purchase ready-made kits designed specifically for this purpose. This method of display enables easy change-out of photos; it works great for more casual rooms in the home, such as playrooms, craft rooms, or even some family rooms.

Wire and Clip Photo Display

Source

3. Plank-Mounted Frames

Talk about a statement-maker! This set of gorgeous handmade photo frames mounted on pretty painted planks is available at the Project Cottage Etsy store. I envision these being displayed prominently on a fireplace mantle. Can you see it?

Plank-mounted frames

Source

4. Photo Collage Wallpaper

Have you heard of We Montage yet? It’s a company whose motto is to “live beyond the frame.” You can upload your digital images to their website to create large-scale photo collages in the form of a removable “wallpaper” that easily adhere to your wall. This method of photo display is a useful option for spaces in which hanging photo frames is not practical.

We Montage Photo Collage Wallpaper

Source

5. Wrap-Around-The Corner Photo Display

If your goal is to introduce “The Unexpected” into a room, this product is sure to please. This picture frame is designed to wrap around 90-degree corners. What a truly innovative way to display those photos, don’t you think?

Wrap Around the Corner Frame

Source

6. Heart-Shaped Collage

Since Valentine’s Day falls at the end of this week, I couldn’t resist wrapping up with this simple, yet design-savvy display option – affixing a collage of photos to the wall in the shape of a heart. Here’s a quick tutorial on how to accomplish this with ease.

Heart SHaped Photo Collage

Source

Displaying cherished photos is a powerful way to make your house feel like home. I hope that you come away from this post inspired to embark on your own unique photo display project. If you do, please return to the blog and tell me about it…and include a photo of your completed project!

For more creative ideas for displaying photos in your home, take a look at the Refined Rooms Phabulous Photo Display Board on Pinterest.


 Want to learn more about Natalie Gallagher and Refined Rooms?  Visit www.RefinedRoomsLLC.com


Organizing your “Undecorate” Process

 
Do you keep the holidays alive throughout the month of January, or have you already begun the holiday “un-decorate” process in your home? Whichever camp you fall in, it’s helpful to think about ways to make next year’s holiday decorating process a little easier on yourself. If you are the type that really dreads the process of holiday decorating, it’s particularly important that you store your holiday items in an organized manner in order to minimize the pain of decking the halls come next December.
 

I thought I’d share a few helpful tips to keep in mind as you begin the process of storing your holiday items for next year…
 

CREATE A DECORATING “CHEAT SHEET”

 
Before disassembling any of your holiday vignettes, be sure to take photos of them. These photos will enable you to easily replicate the vignette on your mantel, bookshelves, and table tops for next year if you don’t have the time or inclination to come up with new ways to display your holiday accessories.
 
Holiday Decorating Cheat Sheet1


I have a file folder named “Holiday Decorating” on my computer that I routinely refer to each November as I begin the process of decorating for the holidays. I typically like to mix things up from year to year. Occasionally, I’ll find my creative juices lacking and I’m thankful to have the photos to use as a “cheat sheet” for re-creating a tried-and-true vignette from a previous year.
 
Holiday Decorating Cheat Sheet 2


IMPLEMENT A STORAGE GAME PLAN


1. IDENTIFY & LABEL HOLIDAY BINS

 
Determine how you will identify your holiday bins among the vast collection of storage bins in your attic/basement. Will they all be a particular color? Right now, the major retailers have most of their bins on sale in a variety of colors for storing holiday décor.
 
Holiday Storage Bins


You will also need to determine how you will keep track of the contents of each bin. You basically have 2 choices: 1) label the contents on the bin itself (using a large label or the ever-popular duct tape/sharpie method), or 2) number the bins and create an inventory of the contents for each numbered bin. You can keep the inventory in your holiday planner/notebook or in a designated folder on your computer.
 

2. SELECT A STRATEGY FOR GROUPING DECOR

 
The way you group your items in storage bins should be determined by how you decorate your home for the holidays. Do you like to decorate with the same items and in the same location every year? If so, group your décor items by the location in which they are displayed (e.g., a “dining room” bin and a “fireplace” bin). If you like to mix it up each year, then it makes more sense to group like items (e.g., a “garland” bin and a “wreaths” bin).
 
Bonus tip: Create a “#1 Bin”, which contains the items that you need early on in the season. This can include items such as your advent calendar, the Elf on the Shelf, and holiday cookie cutters.
 

3. CHOOSE CONTAINERS WISELY

 
My final tip is to put some thought into the containers you choose for storing your holiday items. You will want to avoid stuffing your décor into ginormous 150 gallon bins (particularly if you are storing them in the attic!). If your containers are manageable, it will make the task of lugging them up from the basement each year less aversive.
 
Do you have a tip to share for making next year’s decorating process easier? I’d love to hear it.  Leave a comment below!
 

For more information about Natalie Gallagher and Refined Rooms, visit www.RefinedRoomsLLC.com.


Managing Your Print Photo Collection: Step 1 – Organize

PAPER REFINEMENT SERIES

Did you know that Paper Management is the number one reason that people hire a professional organizer?  Despite our society’s best efforts to “go paperless”, excess paper clutter is a universal challenge in the homes in which I work.  This post is the second in a series of blog posts that will focus on paper management.


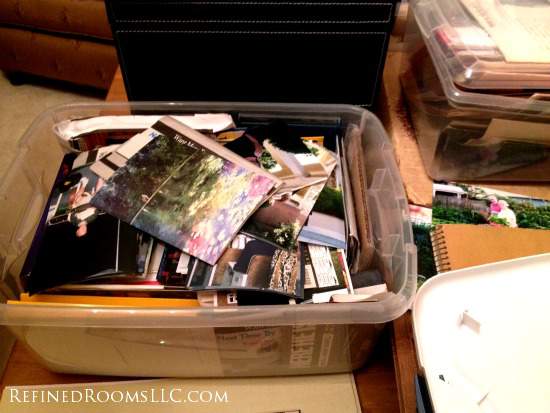
If you ask people what possessions they are most likely to salvage from their home if it was on fire, they are likely to say their photo collection.  Ironically, managing our photo collections is typically a very low priority on our “To Do” list.  Dealing with those shoeboxes full of print photos is one of those tasks that most people plan to tackle “someday”.   A disaster is not the only way photos can be destroyed.  If your photos are improperly stored, you run the risk of losing your precious memories to damage caused by acidic papers, inks, and glues, as well as mold and mildew.  By setting aside time to properly organize and safeguard your old print photos, you will be better able to enjoy them and share them with others for many generations to come.  In today’s post, I’ll provide some basic tips for tackling the organizing process.

ORGANIZING YOUR PRINT PHOTOS

  • If your photos are scattered throughout your home, the first step is to gather all of your photos (including loose photos and photo albums) in one central location.  This location should contain a large, flat work surface.  A dining room table works great for this purpose.

  • Before you begin sorting photos, make sure you have the necessary tools available.  Your photo organizing “tool box” should include:
    • Cotton gloves (to protect photos from skin oils)
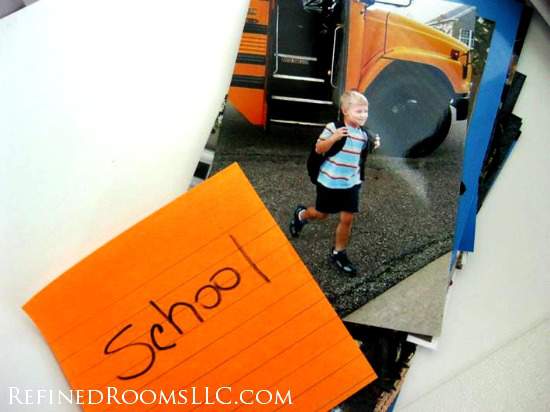
    • Post-It notes/pen (for labeling your categories)
    • Photo safe pencils (for writing notes on the back of photos)
    • Dental floss/hair dryer (for removing stubborn photos from any “peel and stick albums”).
  • Complete an initial “rough sort” by sorting your photos by decade, using shoe boxes to contain each decade.
  • Next, go through each “decade box” and fine-tune your sort.   I recommend sorting photos by theme.  Some common themes include:  Holidays, Travel/Vacations, Sporting Events, School Days, Celebrations, etc.  Sorting categories are based on both your personal preference and the content of your particular collection.


  • As you complete the fine-tuned sort, implement the “ABC’S Method” (developed by the Association of Personal Photo Organizers) to determine which photos to throw away, pass along to others, archive in boxes, and set aside for display/sharing:
    • A Photos:  A stands for Album.  These are your most important and cherished photos; to be displayed in an album, frame, and/or shared online with others;
    • B Photos:  B Stands for Box.  These photos are important enough to keep, but not worthy of displaying necessarily; to be stored in archival quality boxes;
    • C Photos C Stands for Can (as in Trash Can!). These photos are not worthy of keeping; to be thrown away (blurry, unflattering) or given to others (duplicates);
    • S PhotosS Stands for Story.  These photos that might seem unimportant at first (for example, an older photo of a random house), but actually tell an important family story (the photo is the house in which your grandfather grew up).
  • Try to move as quickly as possible during the sorting process and avoid reminiscing.  There will be plenty of time for that once your project is complete!

In my next post, we’ll discuss the ways in which you can safeguard your print photo collection once the organization process is complete.

Want to learn more about Natalie Gallagher and Refined Rooms?  Visit www.RefinedRoomsLLC.com

Refined Rooms LLC is a proud member of the Association of Personal Photo Organizers!