Category Archives: Paper

Organizing Charitable Donations Records to Reduce Tax-Time Stress

We are swiftly approaching that dreaded April 15th tax deadline.  Are you one of the lucky ones who received a hefty tax refund this year?  If so, then tax preparation might be a distant memory for you at this point, since you likely completed your taxes back in February (so that you could get your hands on that big check ASAP).

I know that many of you, however, are currently swimming in 1040 and W-2 forms, trying desperately to bring order to a box of chaotic receipts. One of the most common types of receipts in that “box of chaos” is the charitable donation receipt for household goods.

Throughout the year, you corral a group of items you no longer need/want, such as this:
tax organizing 4
You then bag them up and bring them to your favorite local donation site…

tax organizing 5

…and you get one of these:

tax organizing 6

Most people tuck this receipt away in a file folder (or the “box of chaos”) with the other donation receipts from the current year, never to think about it again until tax “crunch time”  descends upon them.  At this point, they are faced with the stress of a) attempting to remember the particular  items that correspond with each receipt, and b) assigning a monetary value for each donated item.  This can be a painful and time-consuming process if you attempt to accomplish this task in one annual “batch” session.  In fact, I know several people who don’t bother to track this information at all because doing the task on an annual basis is simply too time daunting.

Valuing these goods is important though, because you often donate thousands of dollars worth of items each year, which can translate into hundreds of dollars in tax savings.  If you completed a large decluttering or downsizing project during the year, you could end up donating tens of thousands of dollars worth of household goods.  In these cases, donations can result in quite a significant tax savings. Given the importance of this, I’d like to share a few tips for organizing your (non-cash) charitable donation records that will enable you to take full advantage of your tax deduction:

1.  Take pictures of your donated items

Taking pictures serves two purposes; it provides further documentation of your donated items in the event of an IRS audit, and it provides a visual accounting of your items that you can use for creating your own itemized receipt.

2.  Determine the value of donated items at the time of donation

 Make it a habit to complete the exercise of donation valuation on the same day that you donate your items.  Information regarding the condition of each item will be fresh in your mind, which will result in a more accurate assessment of the value. In addition, this habit will prevent you from having to carve out a large block of time near the tax deadline to complete the overwhelming task of processing a year’s worth of donation receipts all at once.

3.  Take advantage of existing valuation tools

In the past, I’ve referenced both the Goodwill Valuation Guide and the Salvation Army’s Donation Value Guide for determining how much my items were worth. Within the past few years, I discovered a few interactive tools that are useful for this purpose.  These include Goodwill’s Donation Receipt Builder, and most recently, Intuit’s ItsDeductible tool.

ItsDeductible is available as both a web application and a mobile app. It provides a means of tracking cash donations, mileage donations, and household goods donations.

tax organizing 1

In addition to keep a running tally of the total value of the goods I’ve donated each year, ItsDeductible also provides a summary of my actual tax savings to date. Knowing that I’ve saved $127 so far on my 2014 taxes serves as strong motivation to stay on top of this process (it also reinforces the urge to declutter so that I can find more things to donate!)

itsdeductible

 4.  Attach the original donation receipt with your itemized receipt

ItsDeductible syncs directly with Turbo Tax, which is  a boon for Turbo Tax users.  It also generates useful summary reports as well.  For tax documentation purposes, however, it is best to keep an itemized receipt together with the receipt provided by the donation site.

tax organizing 7

 5.  Store all donation receipts for a particular tax year together in a designated location

Whether you choose to scan your receipts and keep all of your documentation electronically (which the IRS now accepts), or you prefer paper records, the final step in the process is to designate a home for these receipts (as well as all of your other tax-related documents) to live until the next tax preparation season arrives. Completing your taxes is stressful enough without the added burden of having to go on a hunting expedition for all of the supporting documentation!

tax organizing 8

What aspects of the tax preparation process do you struggle with the most? Leave a comment and I’ll add it to the list of future blog topics.

Want to learn more about Natalie Gallagher or Refined Rooms? Visit RefinedRoomsLLC.com.

Major Takeaways from the 2014 Association of Personal Photo Organizers Conference

If you’ve ever attended a professional conference, you can relate to that energized, yet frenetic post-conference feeling you have upon returning home.  I have a “post-conference routine” that I engage in to ensure that I capitalize on my conference experience as much as possible.  This routine includes creating a list of core takeaway messages, as well as a list of action steps for implementing all of the new business ideas that conference attendance invariably conjures up.

APPO conference

Earlier this week, I returned from the Association of Personal Photo Organizers (APPO) conference in Dallas and finally had a chance to create my list of core takeaway messages from the conference.  In today’s blog post, I’ll share the list with you.

 Takeaway #1:  

There is a monumental need for photo organizing services

The photo organizing industry is a field that is currently in its infancy.  The field has emerged as a consequence of the huge volume of photos that people have amassed since the advent of the digital camera, as well as the ever-changing sea of technology that has significantly impacted the way in which we capture our memories.  People are often too busy and/or too overwhelmed to regularly manage and safeguard their photo collections on their own.

The need for help is significant.

appo conference too many digital photos

Takeaway #2:  

Our photos are sacred to us

It’s certainly not an earth-shattering revelation to say that our photos are very important to us.  During the conference though, I came away with an enhanced appreciation for just how important a role photos play in our lives.  This message really hit home as I listened to several presenters discuss their amazing stories of various photo rescue efforts following natural disasters that have occurred across the U.S. and Canada.

Because photos are so sacred, it is vital that we all take the necessary steps to ensure that our precious memories are safe in the event of an unthinkable disaster.
appo conference natural disaster photo recovery

Takeaway #3:  

Our photos are everywhere…and that’s a problem

One of the consistent themes throughout the conference was the need to address the universal challenge of having our digital photos scattered across many different devices.  The typical person has segments of their photo collection stored on their phones, tablets, laptops, cameras, and memory cards/flash drives.

The first step for putting a photo management system in place is to establish a digital “hub”–that is, a centralized place where all images will ultimately be stored, once collected from the original image source.

This image created by my APPO colleagues at PSG Photo Solutions provides a useful illustration of the digital hub concept.


appo conference central hub for photos

 Takeaway #4:  

Our photos are not properly backed up…and that’s a problem

Another key component of a good photo management system is setting up an appropriate back up system for your photos.  Several conference presenters shared alarming statistics regarding the percentage of people who don’t back up their photos on a regular basis, or have NO back up system in place whatsoever.

In addition, many people back up their photos to CD/DVD and are under the impression that their photos are safe for the long-term, when in fact, the average shelf life of the typical CD/DVD is 2-5 years.

Takeaway #5:  

The way that we share our photos has changed over time

We print less photos, but share more than we used to.

While rates of photo printing have decreased, the variety of ways in which people “interact” with their photos has increased.  People are choosing to be more creative with their photos, using  photo books and photo products for displaying and sharing.

Of course, the advent of the smart phone, tablet, and picture sharing sites have also contributed to the demise of the print photo.

Friends Using Digital Tablet in Park

Takeaway #6:  

We take a lot of bad photos…but that can be easily remedied

During the conference, I had the opportunity to hear well-known photographer Nick Kelsh discuss the need for ruthless purging of bad photos (and according to him, bad photos are an epidemic).  So many of us tend to keep every single shot we’ve ever taken.  Don’t be afraid to throw away the blurry ones…and the photos of your foot that you took accidentally.

Nick also offered these simple, yet powerful tips to reduce the number of bad photos you will eventually need to cull from your collection:

appo conference Nick Kelsh photography advice


Gift Wrap Solutions


Source

 
Here we are, 3 days before Christmas, and most of us are surrounded by stacks of gifts that are in need of wrapping. Perhaps this is the only time of year you find yourself knee-deep in wrapping paper rolls, gift tags, and bows. For many of us, we find ourselves frequently accessing the gift wrap supplies throughout the year for wrapping birthday gifts, hostess gifts, Mother’s and Father’s Day gifts and graduation gifts.
 
Whether you use gift wrap supplies regularly or once a year, having an organized storage solution in place for these supplies will enable you to complete the task of gift wrapping as painlessly as possible.  Here are some common types of solutions to consider if you on a mission to organize your gift wrap supplies this year…


Rolling Carts


Source

 
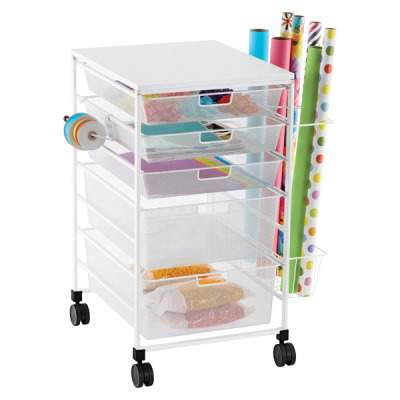
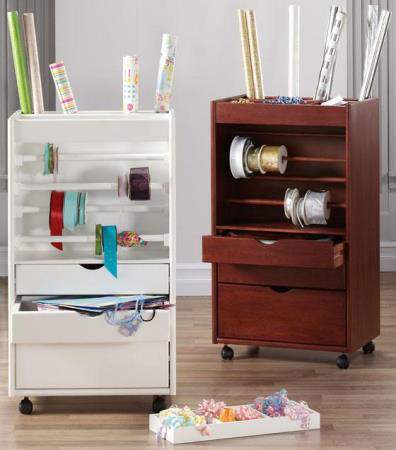
Storing your gift wrap and accessories in a rolling cart enables you to roll it out to the location you want to use it (in front of the t.v. is a great spot for completing a marathon wrapping session), and then easily store it back in a corner of your room or in your closet when not in use.


Source


Vertical Storage Solutions

 
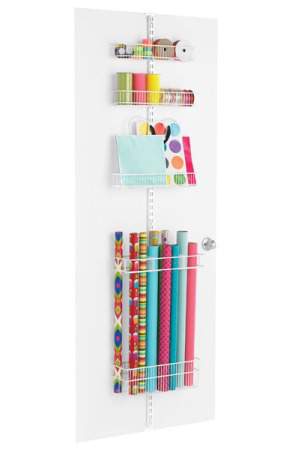
In previous blog posts, I’ve emphasized the importance utilizing vertical space  in your home to increase storage space, particularly the back of your doors.  Consider installing a door storage solution such as the one pictured below in a guest room, craft room, or even in your home office.
 

Source


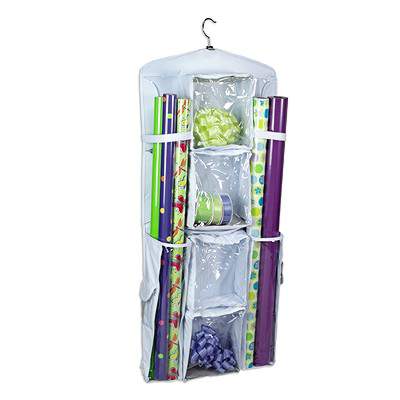
This hanging gift wrap storage station is another storage option that takes advantage of vertical space…within your closet. It offers the benefit of portability as well.


Source


Under-the-Bed Storage Solutions

 
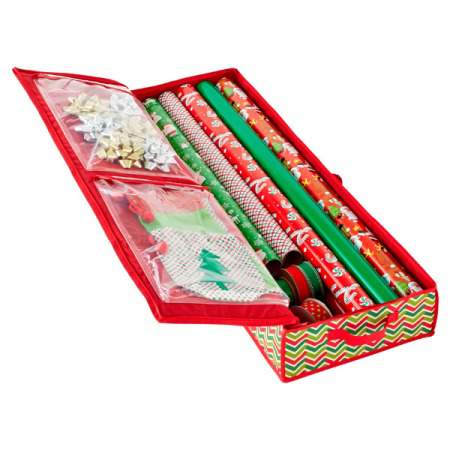
Another common place to stow away gift wrap materials is under the bed.  The shape of gift wrap rolls (small and long) make them great candidates for under-the-bed storage.  If this particular storage area of your home has been under-utilized, you may want to use an under-the-bed storage tote for corralling your rolls of gift wrap, as well as ribbon and gift tags.
 

Source

 
Have another storage solution that you love?  Please share by leaving a comment below.  Happy Wrapping!
 

To learn more about Natalie Gallagher and Refined Rooms LLC visit www.RefinedRoomsLLC.com.


Overcoming Holiday Overwhelm – Part 2


wreath2

 
In Part 1 of this series, I discussed the importance of setting realistic expectations and adopting a Zen attitude regarding the holiday season, as well as the importance of eliminating as many holiday obligations as possible. In Part 2, I outline 5 valuable tips for enhancing the joy and reducing the stress of the holiday season.
 

1. BEGIN PLANNING EARLY

 
Would it surprise you to hear that most of the holiday planning books and resources suggest that you begin the planning process in late September/early October? When you begin your planning well in advance of the official holiday season, it will enable you to spread out your massive To Do list into bite-size chunks. In addition, you will be able to identify tasks that can be completed well in advance, which frees up more time for relaxation and enjoyment as the holiday week draws near.
 

2. CREATE A MASTER HOLIDAY TO DO LIST AND CALENDAR

 
Begin the planning process by creating a Master Holiday To Do list, that outlines each task that you need to complete for the holidays and order them by the month in which the task needs to be completed. Be sure to consider the following broad categories when creating your To Do List:

Holiday Home Preparation – cleaning, decluttering, decorating;

Holiday Hosting – food shopping, menu planning, sending out invitations, cooking/baking;

Holiday Shopping/Gift Giving – budget, gift recipient list, gift ideas, shopping, gift wrapping, homemade gifts;

Holiday Traditions – family portrait, holiday cards, caroling, tree farm, religious events.

 
Once you’ve completed your To Do list, the next steps in your planning process are to 1) estimate how long each task will take to complete, 2) determine a start date and a deadline for each task, and 3) enter these dates into your holiday calendar.
 

3. CREATE A HOLIDAY PLANNING NOTEBOOK

 
christmas-planner
 
A holiday planning notebook is the most essential tool for maintaining your sanity this time of year. The planner should serve as the home for all information, resources, and planning tools you need to accomplish the tasks on your Master Holiday To Do List. In addition to your To Do List and calendar, the holiday planner should contain the following:  budget, gift list, party menus, holiday card recipient list, coupons, and receipts.
The notebook can be created using a variety of formats; I suggest using a 3-ring binder with page protector inserts to contain your papers. The good news is that there are several fabulous online resources for creating a holiday planning notebook so you don’t need to start from scratch! My favorite resources for free holiday planning printables are the Organized Christmas and Christmas Your Way websites. Both of these websites offer a holiday calendar and a master Holiday To Do list, as well as many other blank checklists, inventory sheets, and shopping lists. No need to reinvent the wheel, right?
 

4. USE HOLIDAY PLANNING APPS

 
holiday organizing app


If you prefer electronic over paper organizing solutions, there are a ton of holiday planning apps out there for you to explore. Some apps assist with managing your gift purchases/budget, while others assist with holiday meal/menu planning.
 

5. DELEGATE

 
A primary cause of holiday overwhelm is the belief that we have to complete all of the items on our Master Holiday To Do list ourselves. This year, I invite you to challenge that belief and explore ways to delegate the responsibility for some tasks to others. Have your kids stuff the holiday cards into the envelopes. Divvy up the gift shopping list between you and your spouse. If you are hosting a holiday dinner party, make it a “potluck” so that you are preparing only the main course instead of the entire dinner.
 
Alternatively, consider hiring professionals to outsource certain tasks (a handyman to install exterior lights, a professional cleaning service, a printing company to address and send out holiday cards). The small investment will pay you back tenfold in the form of reduced stress!
 
Do you have a favorite holiday planning tool, resource, or method? Leave a comment below. We’d love to hear about it!


Managing Your Print Photo Collection: Step 2 – Safeguard

 
In Part I of Managing Your Print Photo Collection, we gathered our photos together with our photo organizing “tool box” on hand, and decided which photos were “keepers”. We then determined the sorting themes/categories for our collection, after first performing a rough chronological sort. Once we’ve completed the sorting and purging process, we need to take the necessary steps to safeguard our photos for the long-term.


SAFEGUARDING YOUR PRINT PHOTOS


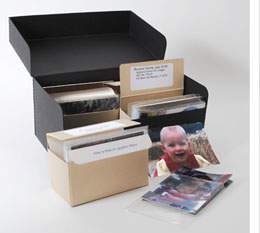
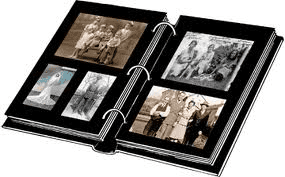
  • Use only archival-quality photo boxes (to store B Photos) and albums (to display A Photos). Archival quality products are acid and lignin-free, so they will not accelerate the natural deterioration process inherent in print photos. Some great sources for these products include: Archival Methods and University Products.


  • Scan your print photo collection to create a digital version of your photos. If you have the time and the right equipment, you can complete this job yourself. Alternatively, you can outsource this task and have a professional photo organizer complete it for you. You’ll need to decide if it’s worth the investment to digitize your entire collection, or perhaps just your “A Photos”.
  • Once your collection is digitized, put a redundant back-up system in place so that your digitized print photo collection AND your collection of digital images are protected. Your back-up system should include an external hard drive back-up, as well as storage “in the cloud”. There are a large number of cloud-based options, including those that offer storage only (e.g. Drop Box, Carbonite), as well as websites that include photo management features as well as photo storage (e.g., Flickr, Photobucket). You may also want to consider using Picture Keeper as part of your back-up system. When you plug this flash drive device into your computer, it automatically finds and copies all image files located throughout your computer’s hard drive.

To make it even easier for you to put a back-up system in place for your photos, Picture Keeper is offering a deep discount on their products during the month of November:


Save 28% on Entire Purchase with Free Shipping!


Once you’ve organized and safeguarded your print photo collection, it becomes much easier to integrate these precious memories back into your life. By creating digital photo books, online albums and traditional scrapbooks for yourself and others, you and your family members will be able to enjoy reliving these special moments for years to come.


Need assistance putting a back-up system in place for your photo collection? Contact Natalie Gallagher at Refined Rooms LLC to learn more about photo organizing services.  We are a proud member of the Association of Personal Photo Organizers.
 

Managing Your Print Photo Collection: Step 1 – Organize

PAPER REFINEMENT SERIES

Did you know that Paper Management is the number one reason that people hire a professional organizer?  Despite our society’s best efforts to “go paperless”, excess paper clutter is a universal challenge in the homes in which I work.  This post is the second in a series of blog posts that will focus on paper management.


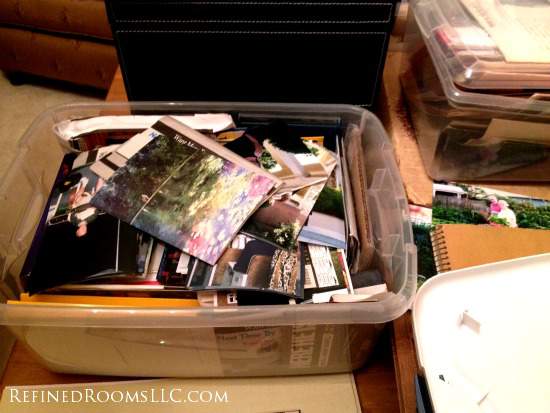
If you ask people what possessions they are most likely to salvage from their home if it was on fire, they are likely to say their photo collection.  Ironically, managing our photo collections is typically a very low priority on our “To Do” list.  Dealing with those shoeboxes full of print photos is one of those tasks that most people plan to tackle “someday”.   A disaster is not the only way photos can be destroyed.  If your photos are improperly stored, you run the risk of losing your precious memories to damage caused by acidic papers, inks, and glues, as well as mold and mildew.  By setting aside time to properly organize and safeguard your old print photos, you will be better able to enjoy them and share them with others for many generations to come.  In today’s post, I’ll provide some basic tips for tackling the organizing process.

ORGANIZING YOUR PRINT PHOTOS

  • If your photos are scattered throughout your home, the first step is to gather all of your photos (including loose photos and photo albums) in one central location.  This location should contain a large, flat work surface.  A dining room table works great for this purpose.

  • Before you begin sorting photos, make sure you have the necessary tools available.  Your photo organizing “tool box” should include:
    • Cotton gloves (to protect photos from skin oils)
    • Post-It notes/pen (for labeling your categories)
    • Photo safe pencils (for writing notes on the back of photos)
    • Dental floss/hair dryer (for removing stubborn photos from any “peel and stick albums”).
  • Complete an initial “rough sort” by sorting your photos by decade, using shoe boxes to contain each decade.
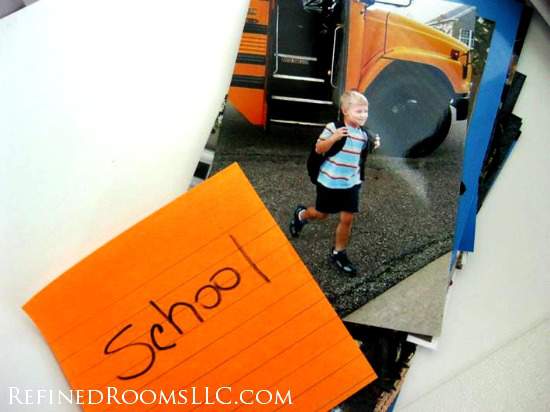
  • Next, go through each “decade box” and fine-tune your sort.   I recommend sorting photos by theme.  Some common themes include:  Holidays, Travel/Vacations, Sporting Events, School Days, Celebrations, etc.  Sorting categories are based on both your personal preference and the content of your particular collection.


  • As you complete the fine-tuned sort, implement the “ABC’S Method” (developed by the Association of Personal Photo Organizers) to determine which photos to throw away, pass along to others, archive in boxes, and set aside for display/sharing:
    • A Photos:  A stands for Album.  These are your most important and cherished photos; to be displayed in an album, frame, and/or shared online with others;
    • B Photos:  B Stands for Box.  These photos are important enough to keep, but not worthy of displaying necessarily; to be stored in archival quality boxes;
    • C Photos C Stands for Can (as in Trash Can!). These photos are not worthy of keeping; to be thrown away (blurry, unflattering) or given to others (duplicates);
    • S PhotosS Stands for Story.  These photos that might seem unimportant at first (for example, an older photo of a random house), but actually tell an important family story (the photo is the house in which your grandfather grew up).
  • Try to move as quickly as possible during the sorting process and avoid reminiscing.  There will be plenty of time for that once your project is complete!

In my next post, we’ll discuss the ways in which you can safeguard your print photo collection once the organization process is complete.

Want to learn more about Natalie Gallagher and Refined Rooms?  Visit www.RefinedRoomsLLC.com

Refined Rooms LLC is a proud member of the Association of Personal Photo Organizers!

Manuals, Warranties, and Receipts…Oh My!


Paper Refinement Series

Did you know that Paper Management is the number one reason that people hire a professional organizer?  Despite our society’s best efforts to “go paperless”, it has certainly been my experience working as a professional organizer that excess paper clutter is a universal challenge in the homes in which I work.  As such, today I am posting the first in a series of blog posts that will focus on paper management.


Organizing Manuals, Warranties & Receipts

 
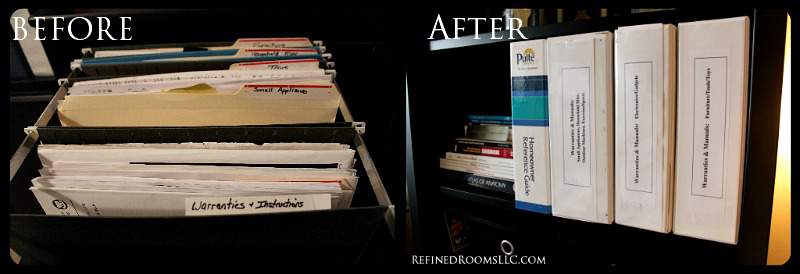
Let’s begin with organizing all of the reference paperwork for product purchases.  A common source of paper clutter that I come across in client’s homes is product manuals, warranties, and receipts for big-ticket items.  I have a favorite method for corralling all of these when on the job.  Until recently, however, I had not found the time to properly organize my own set of manuals (ever hear that saying about the cobbler’s children who have no shoes?  Sometimes this holds true for organizers too)!  As you can see from the picture below, these papers were taking up an entire drawer in my filing cabinet.  As part of my recent file cabinet overhaul, my goal was to free up the filing cabinet drawer for storing my business-related files.


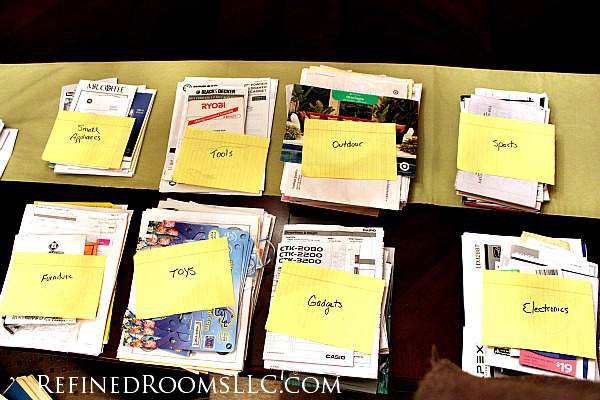
As you might have guessed, the first step in the process is to gather all the paper into a central location and begin sorting into categories.  I suggest that you set aside papers for home improvement purchases (i.e., carpeting, plumbing fixtures) and large appliances.  These papers should be placed in a separate binder to be given to the new homeowner in the event that you sell your home.   That leaves you with the papers for items that would go with you in the event of a move.  Depending upon your consumer tendencies, your piles may look something like this:


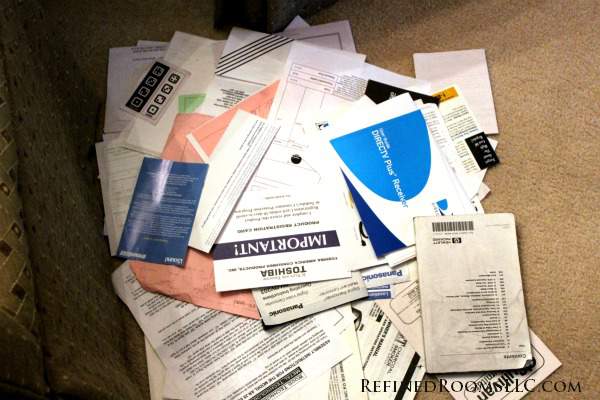
During the sorting process, have the recycle bin close at hand, as you will invariably come across manuals and warranties for items you no longer own, especially if it’s been a few years since you’ve tended to these files:


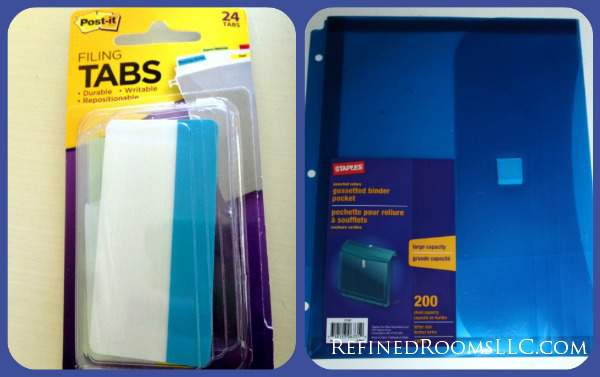
My preferred method for containing all of these papers is to use 3-ring binders that use poly binder pockets with Velcro closures for each category of products.  Staples has a binder pocket that works great for this purpose, and can accommodate up to 200 pages per pocket (see below).  I use stick-on filing tabs (see below) to label the product categories.


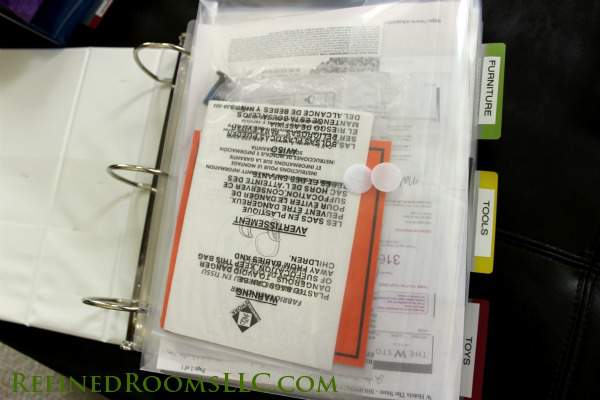
Take a peek at what the binder looks like when fully assembled:


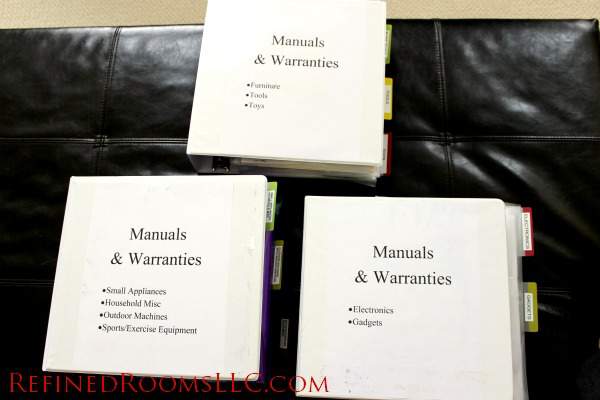
One binder is rarely sufficient for the average household with kids.  In fact, our papers required a total of four binders to contain all of our product manual/warranty information (the three binders for “portable” products below, as well as our binder for stuff that will stay with the house).
 
The final step is to create a cover sheet and a spine insert for the binder that summarizes the product categories contained within each binder:


Of course, for those who are really on the “paperless” bandwagon, you can often bypass this whole process by searching for the PDF versions of the product manuals online, as most manufacturers are making manuals available electronically now.

To learn more about paper organizing/management and Natalie Gallagher, visit http://www.refinedroomsllc.com